Workpage 3-26
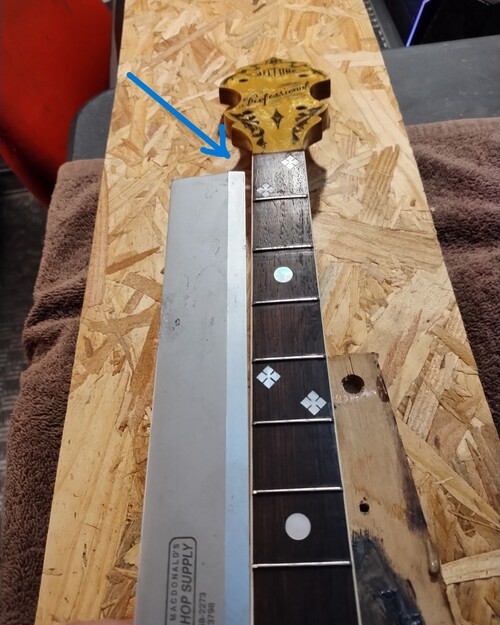
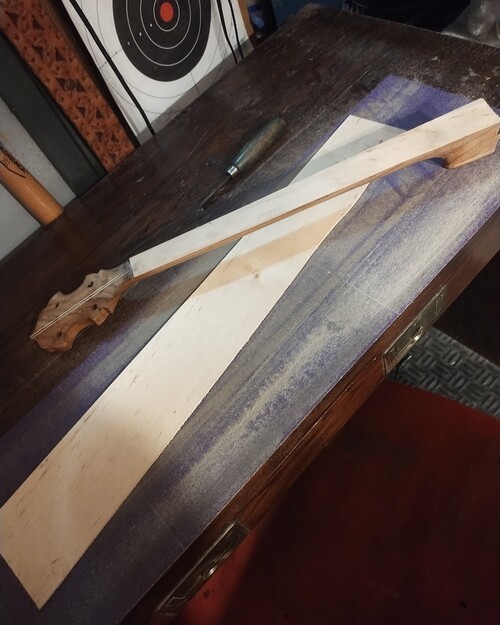
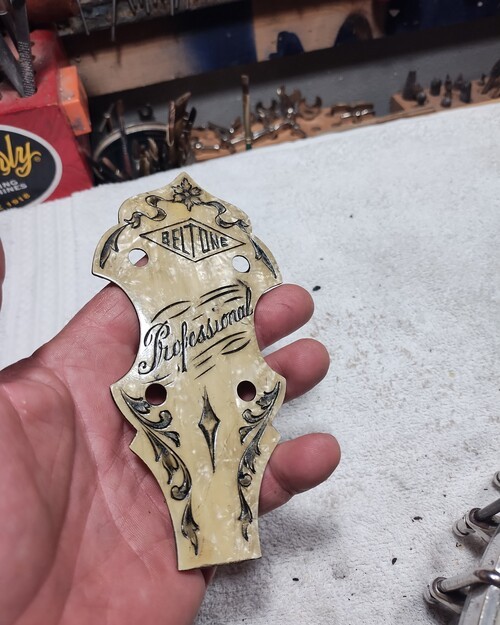
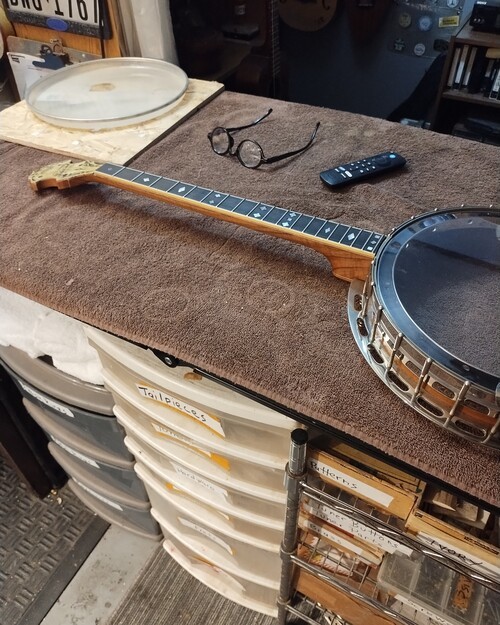
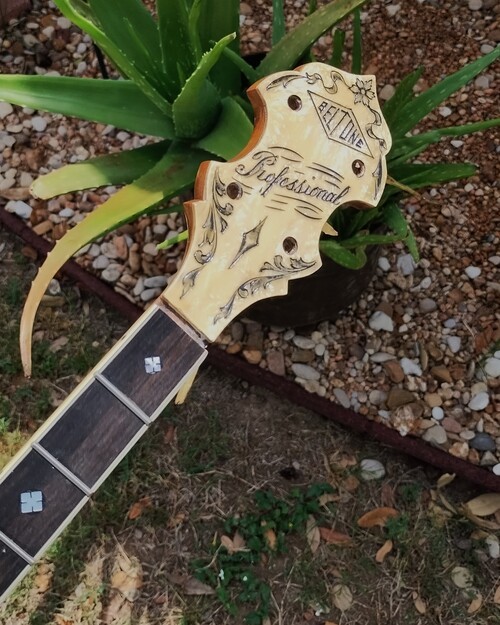
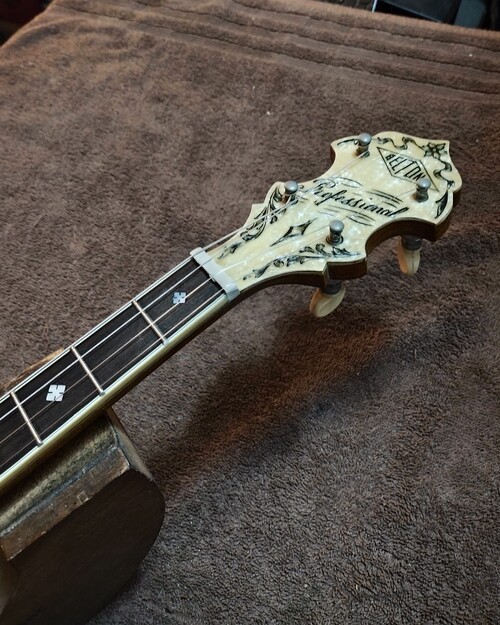
1920s Epiphone Beltone Professional
19 fret tenor
Circa 1930's
"Beltone" is a budget line from Epiphone, sold through mail-order as well as other musical instrument distributors of the era.
Circa 1930's
"Beltone" is a budget line from Epiphone, sold through mail-order as well as other musical instrument distributors of the era.
This instrument is one that was purchased from AZ.
And the page will reflect mainly on instruments that have lived lives in extreme climates.
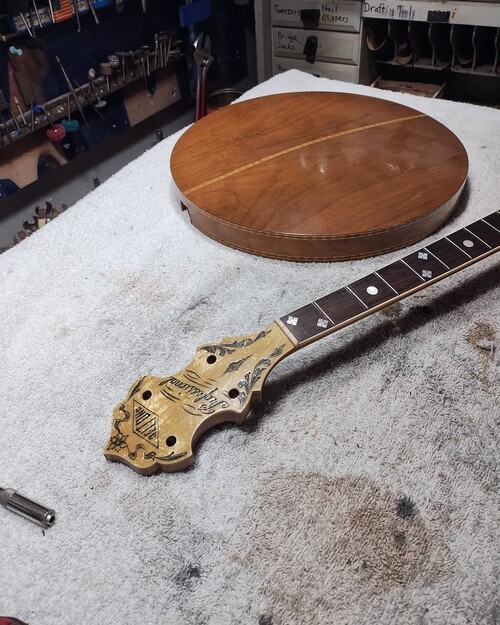
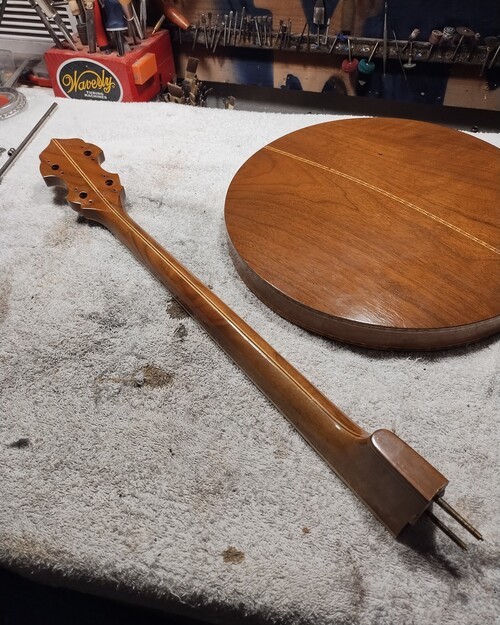
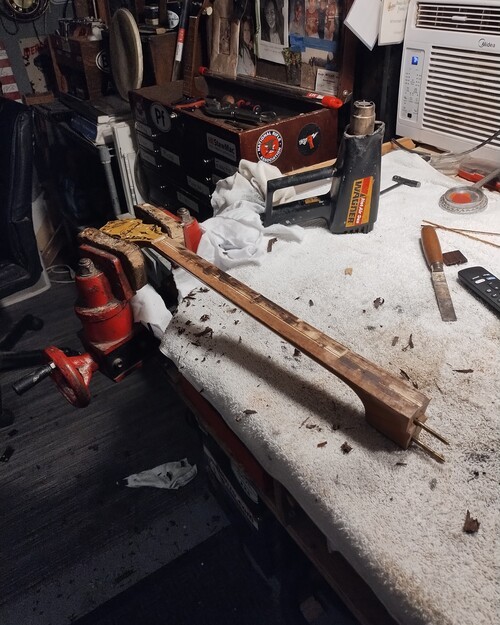
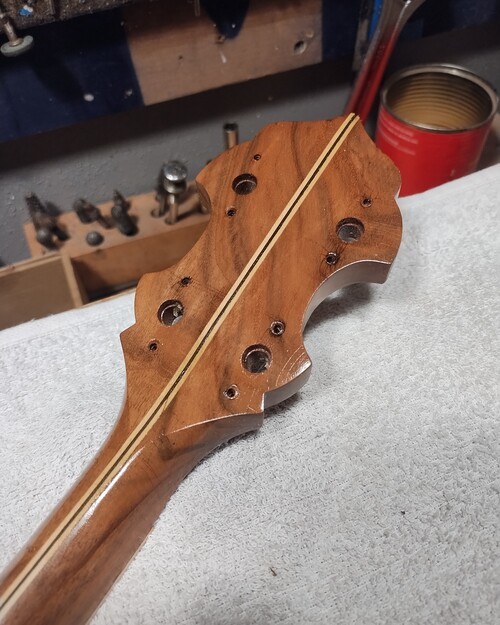
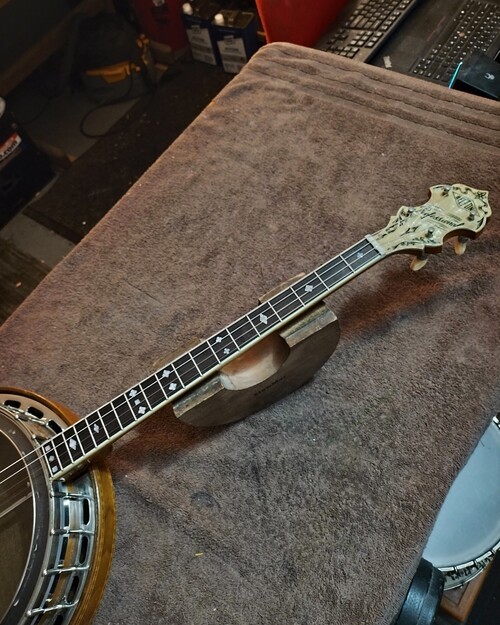
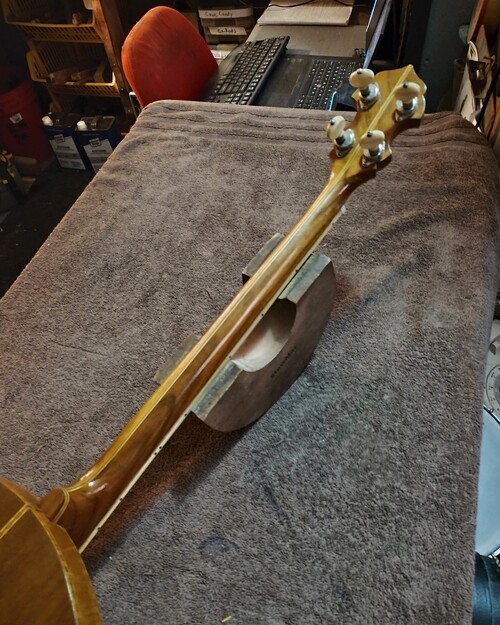
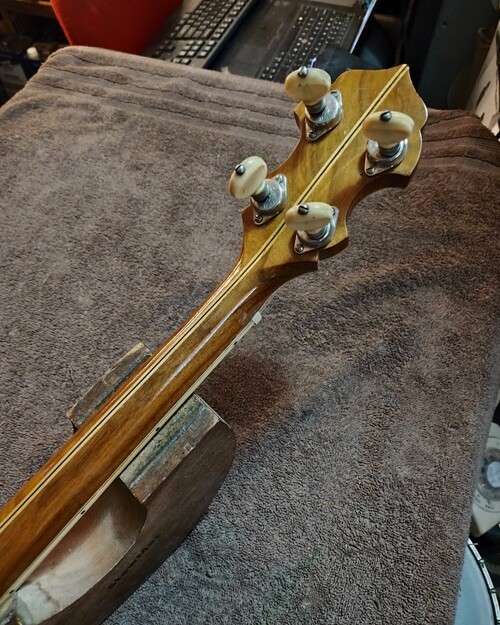
And on this particular example, the neck.
It was made from American Walnut, a common wood used back in the day.
When I received it it all was in a VG original condition with all parts original.
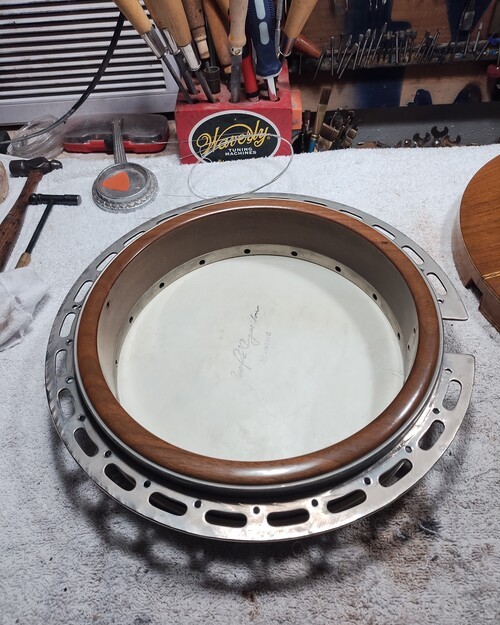
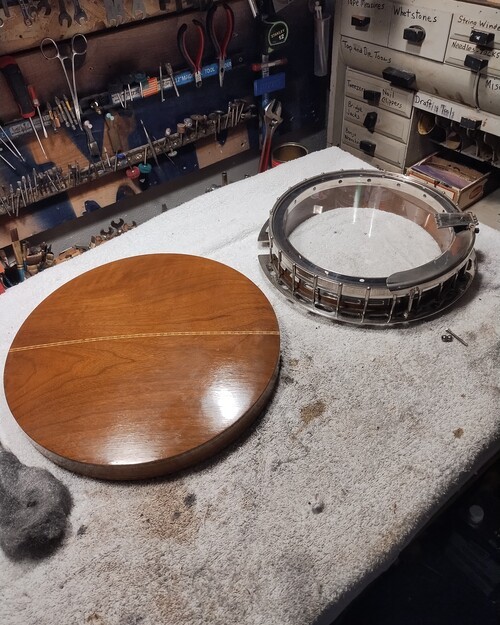
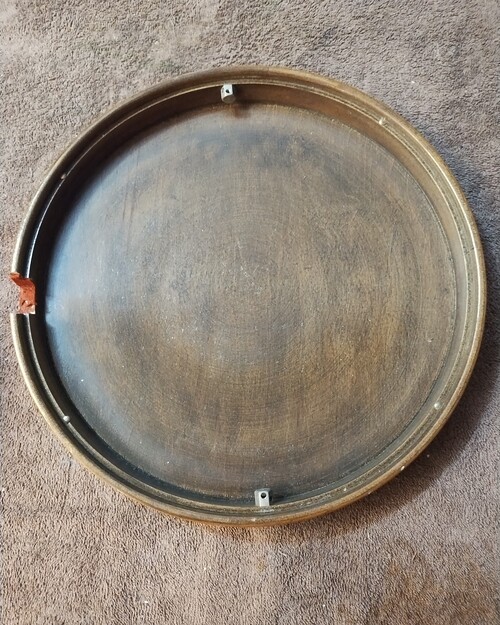
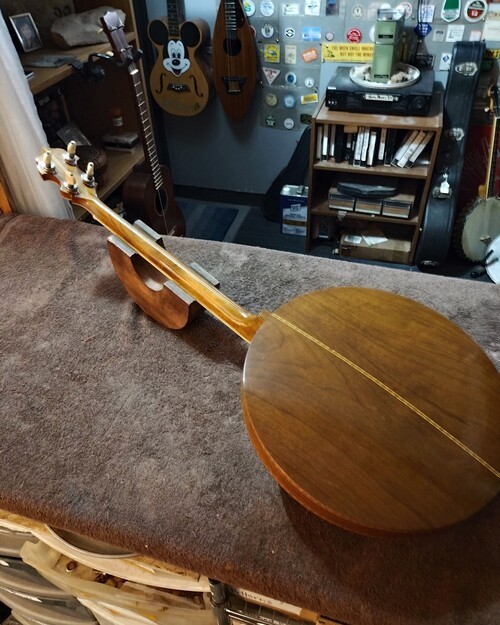
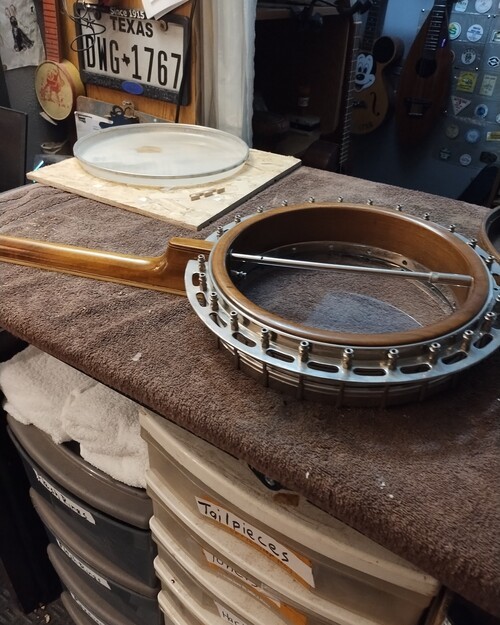
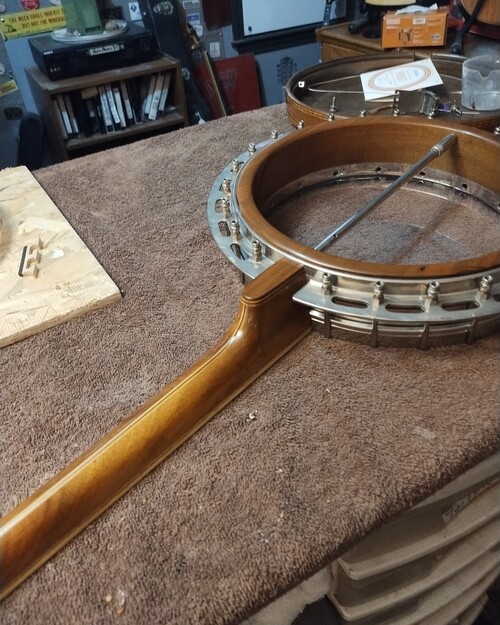
I show the rim assembly and its clean-up/setup on a new head.
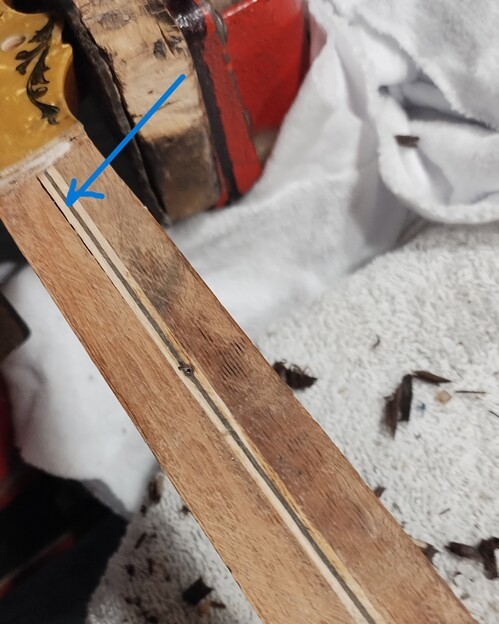
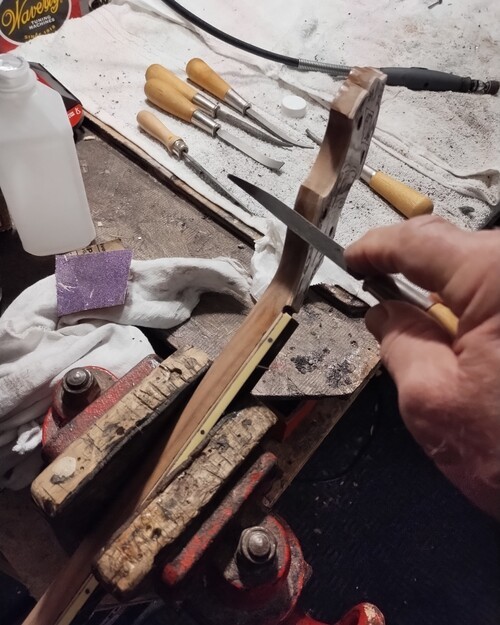
Then I show what an extremely dry climate mixed with choices of wood grain can do to a laminated neck.
So the focus is on the neck and how I approach the attempt of the reversal of all of its issues.
**********************************************
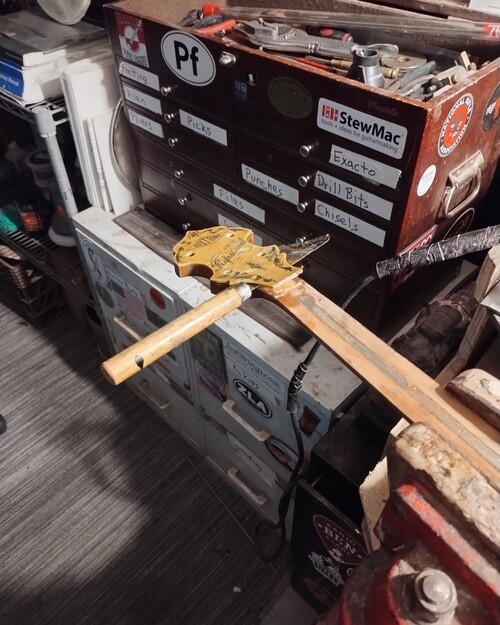
Sequence #1
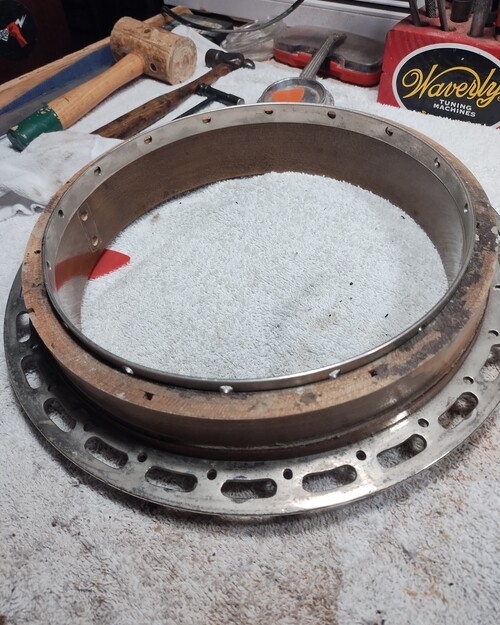
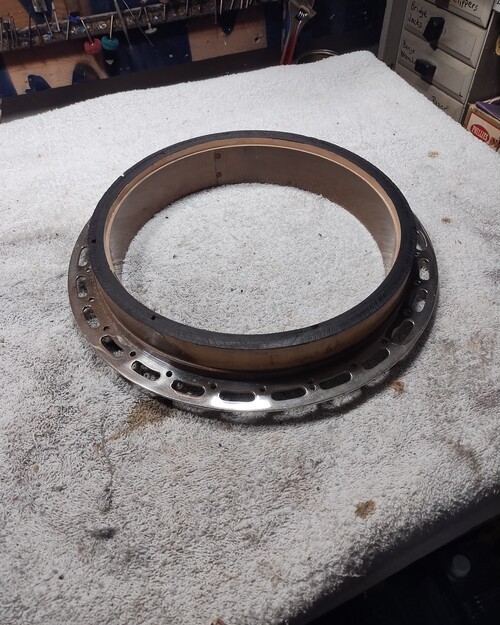
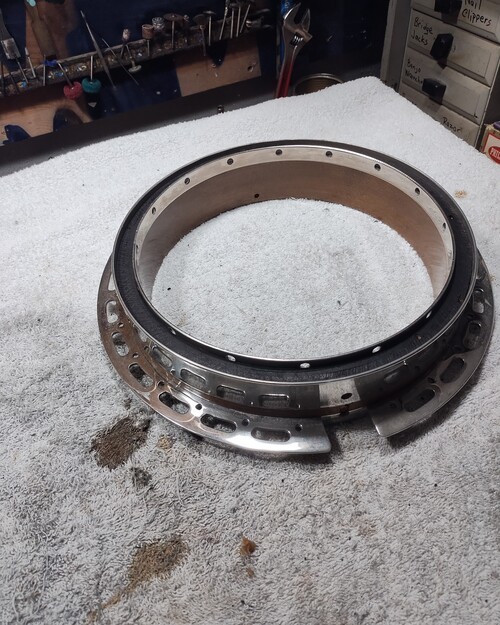
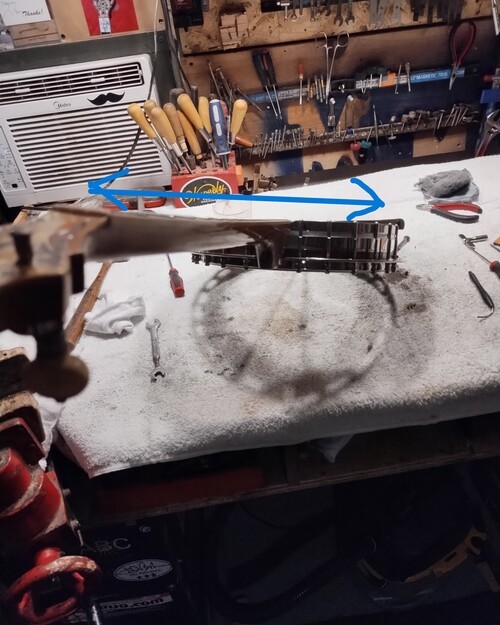
Neck off - rim disassembly/clean-up/setup
And the page will reflect mainly on instruments that have lived lives in extreme climates.
And on this particular example, the neck.
It was made from American Walnut, a common wood used back in the day.
When I received it it all was in a VG original condition with all parts original.
I show the rim assembly and its clean-up/setup on a new head.
Then I show what an extremely dry climate mixed with choices of wood grain can do to a laminated neck.
So the focus is on the neck and how I approach the attempt of the reversal of all of its issues.
**********************************************
Sequence #1
Neck off - rim disassembly/clean-up/setup
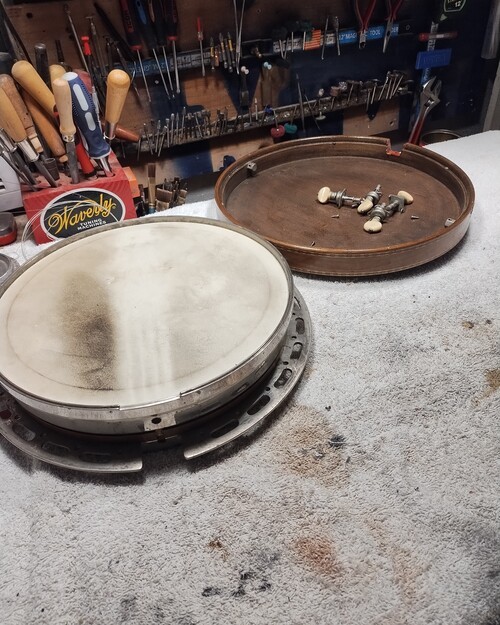
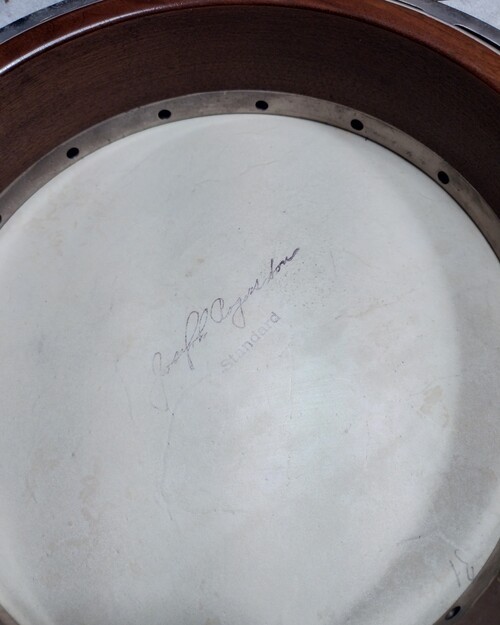
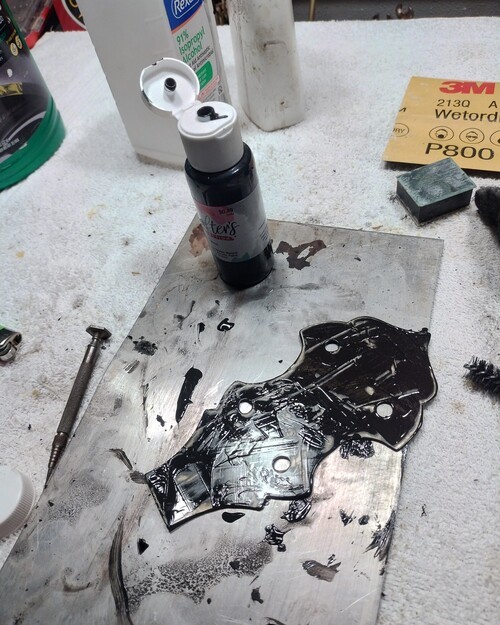
I dyed the top of the rim as I do when I run a clear head.
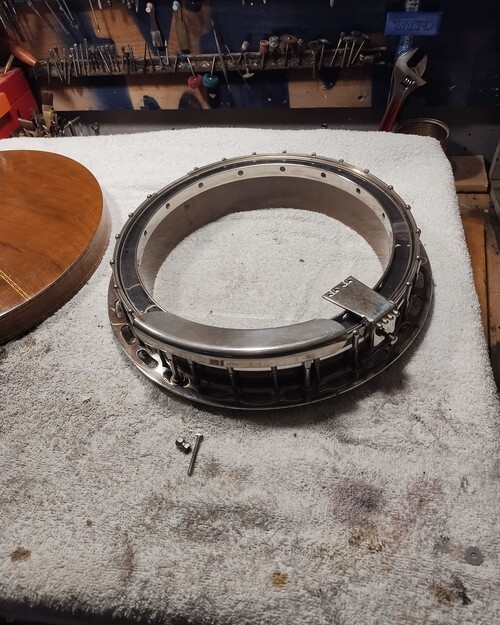
At full head tension.
Ready to clean.
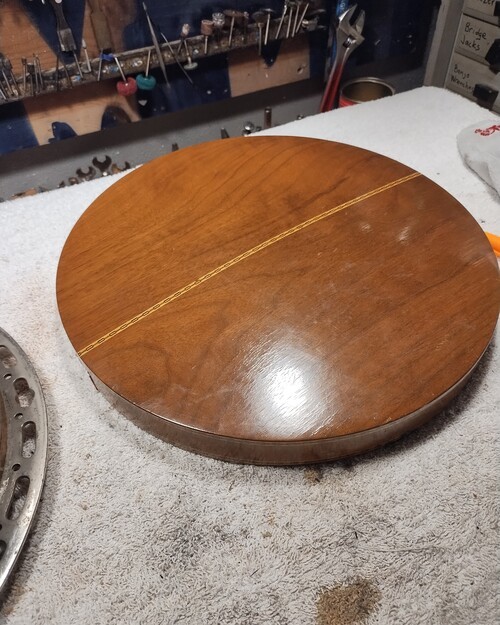
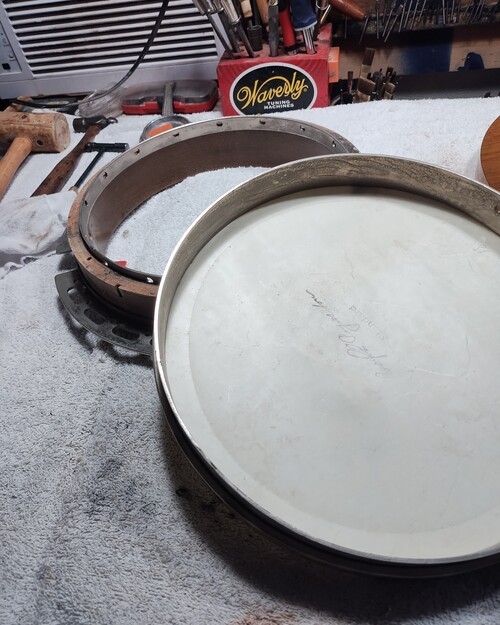
I will bag this up for now. On to the neck.

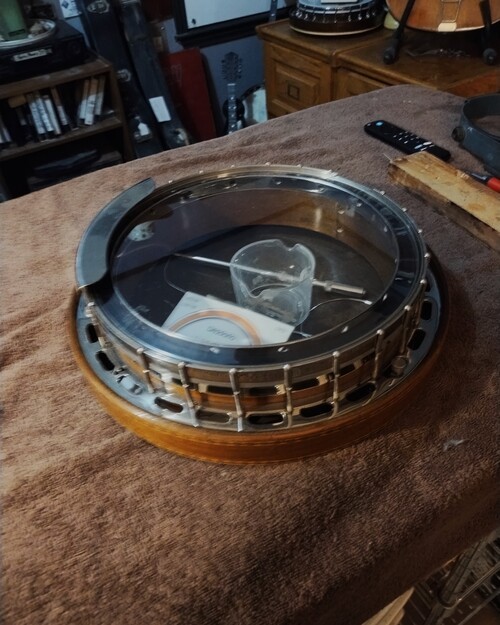
The head is still at full tension, it is tight!
All cleaned and waxed.
Sequence #2 - Neck Work
The procedure I have facing me is to build a jig that can, all in one heating/bending/pressing/twisting process, take a neck that is affected on EVERY possible axis, with the addition of a 5/16" square bar steel truss, ALL THE WAY BACK to a flat/ non curved/ non forward bow condition.
The jig will use a block of wood that is used as a "cam" to push one way, and a screw to twist the neck to level, and a brace to force the neck into a back bow, and then, 180F heat until it all releases and a cure/cool before cutting a cavity for the rod.
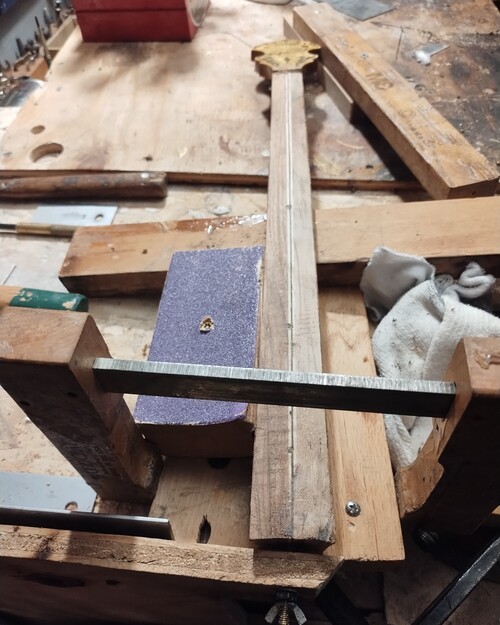
I will check the neck constantly with a level bar in all aspects.
Then when it is where I want it I will epoxy/wood floor the rod into place and then blacken the wood so I can see where the high/lows are under 80 grit flat leveling.
When it gets level I will add a maple laminate like the original and level that before installing a fingerboard.
NOTE:
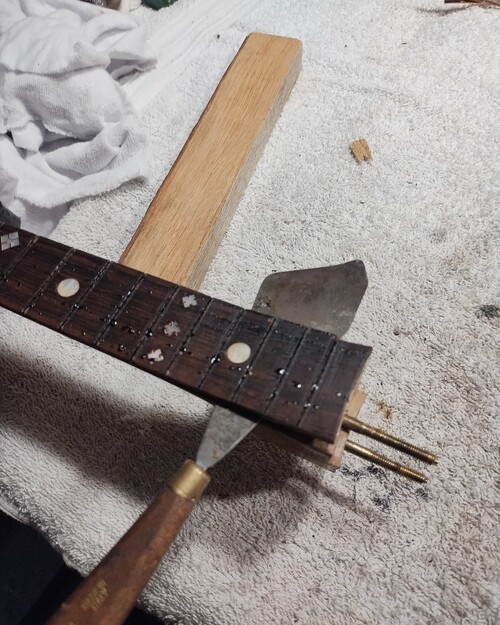
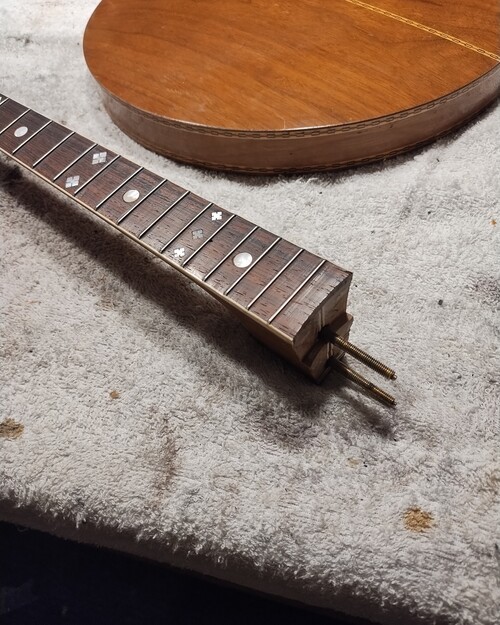
The fingerboard on these models have small nails holding them centered from the assembly process and the fingerboard was impossible to remove in one piece so it will be replaced.
The jig will use a block of wood that is used as a "cam" to push one way, and a screw to twist the neck to level, and a brace to force the neck into a back bow, and then, 180F heat until it all releases and a cure/cool before cutting a cavity for the rod.
I will check the neck constantly with a level bar in all aspects.
Then when it is where I want it I will epoxy/wood floor the rod into place and then blacken the wood so I can see where the high/lows are under 80 grit flat leveling.
When it gets level I will add a maple laminate like the original and level that before installing a fingerboard.
NOTE:
The fingerboard on these models have small nails holding them centered from the assembly process and the fingerboard was impossible to remove in one piece so it will be replaced.
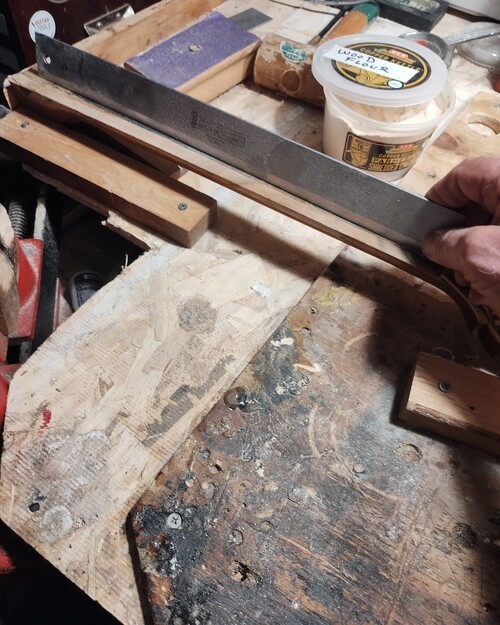
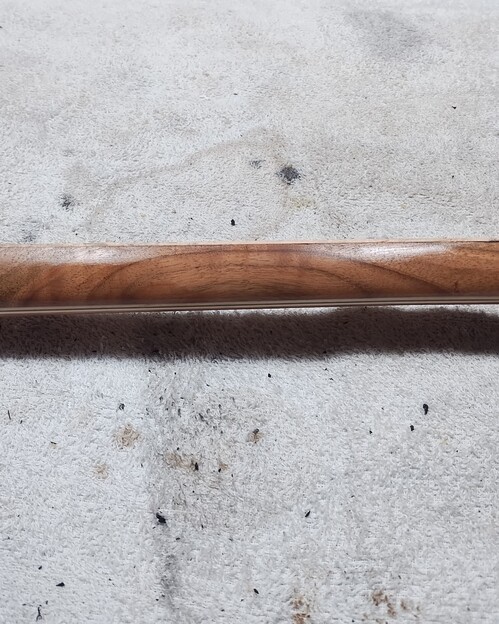
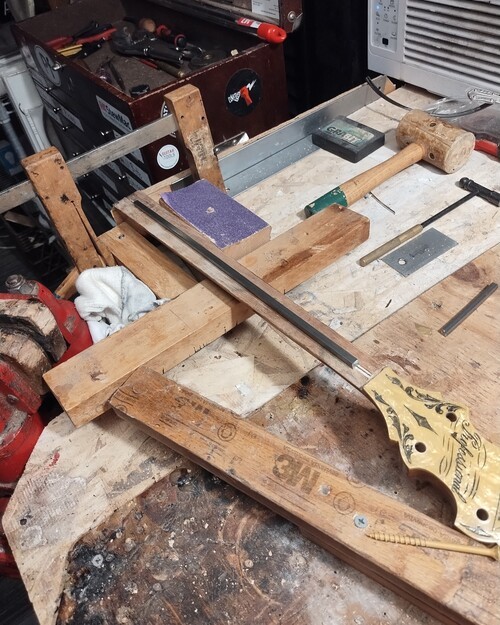
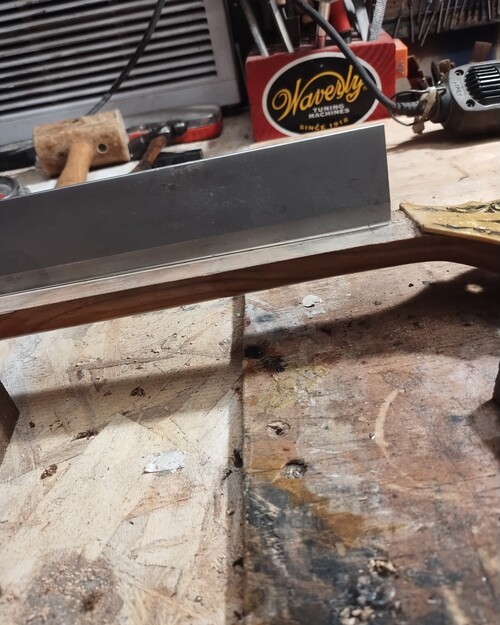
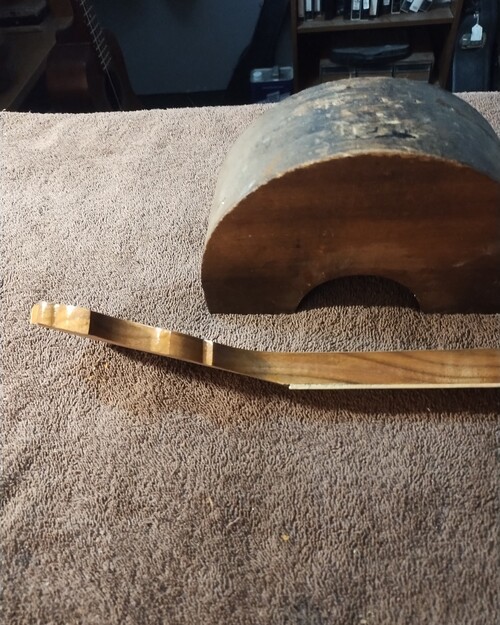
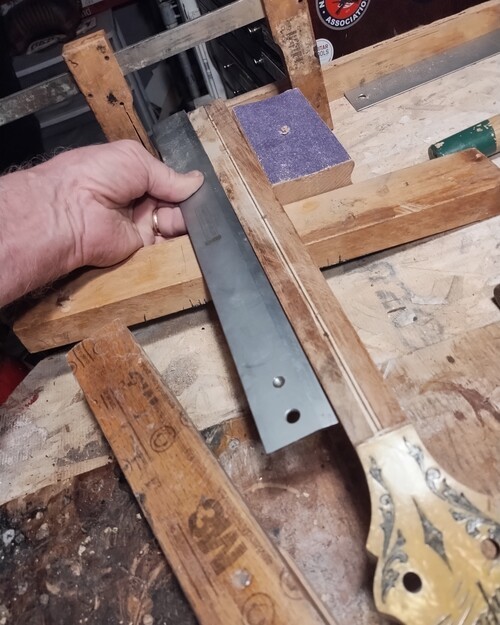
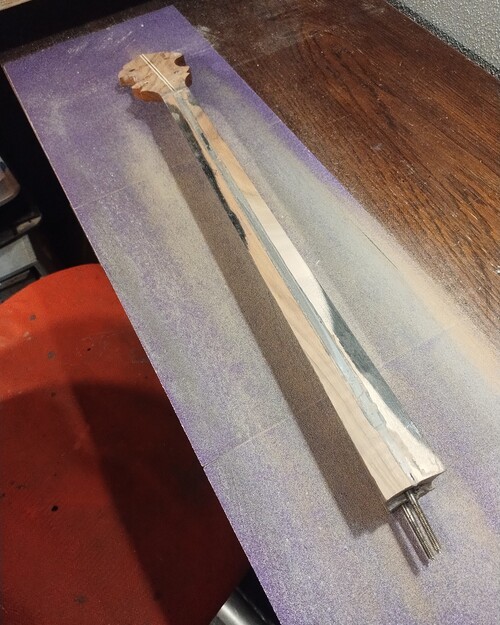
Flat bar showing curve.

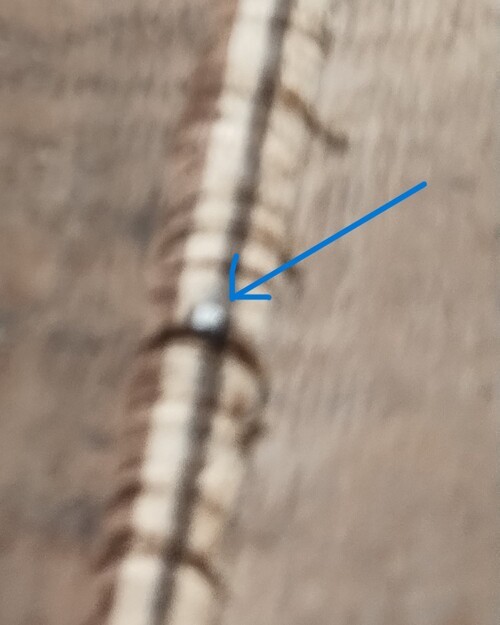
Seam separation and nail holes
Also now pushing a backbow into the neck.
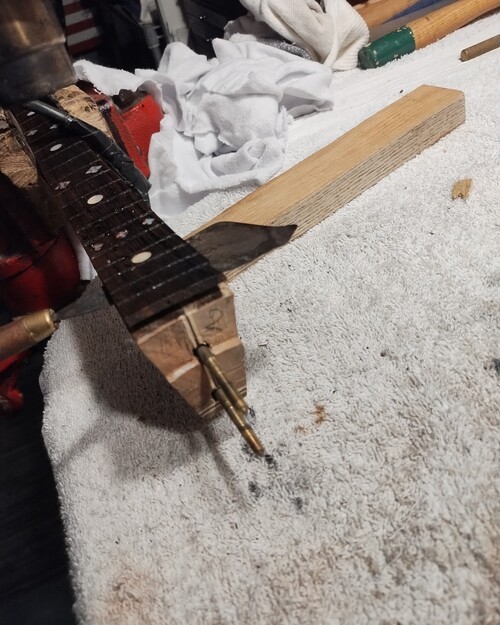
Cutting bar stock with fret saw, they are tougher than you think.
They were placed under the inlay into the rosewood,

This is after cure, Will spring back some upon release,
Final check with level bar..

Final sealing of laminates.
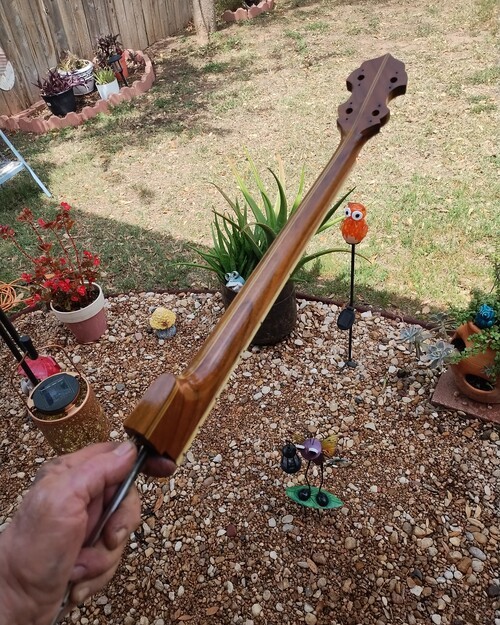
New laminate installed, all is level again..
New acrylic added.
Neck builders of today...take note.
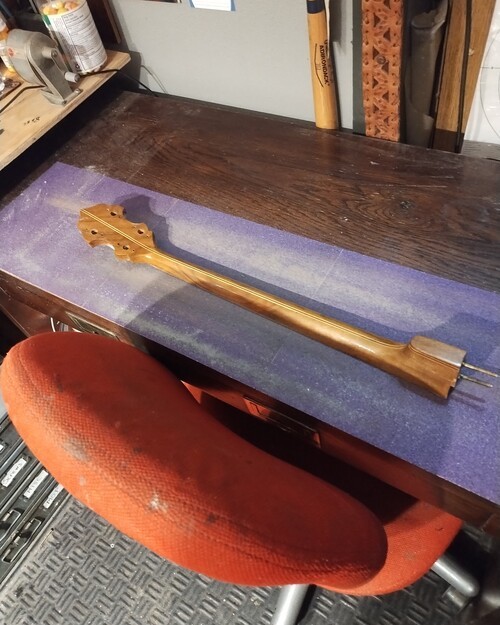
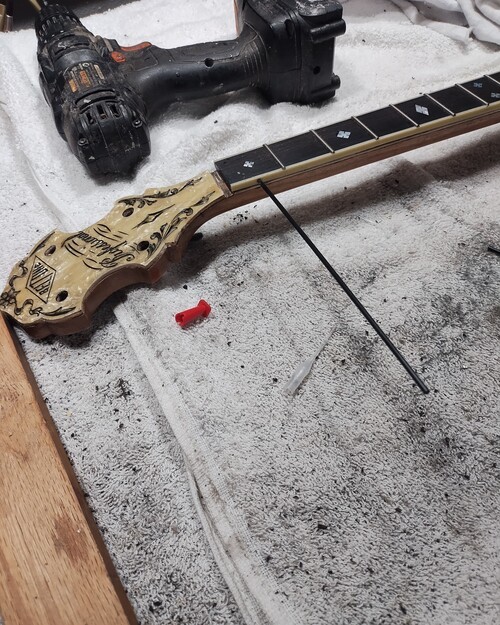
Sun-bleached from being on a stand in the desert sun. Not the first time i have seen this.

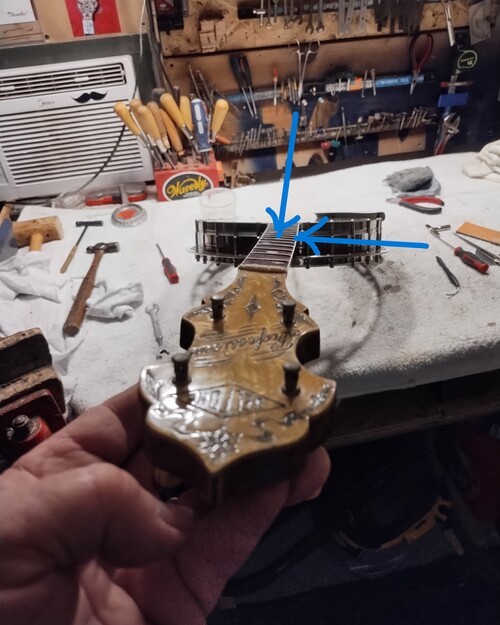
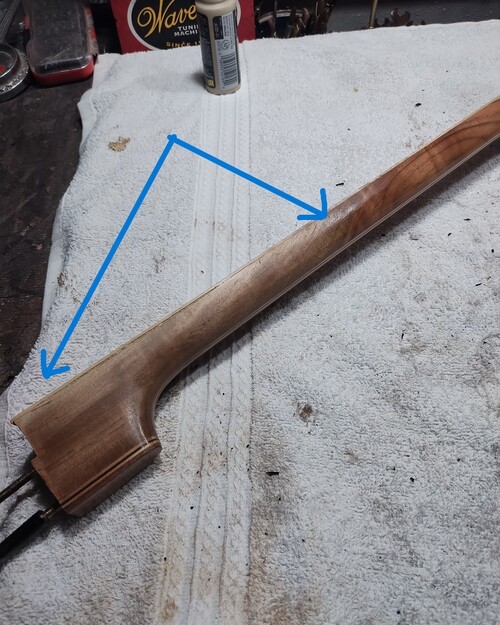
Showing curve, and twist.
Showing forward pull under 0 tension.
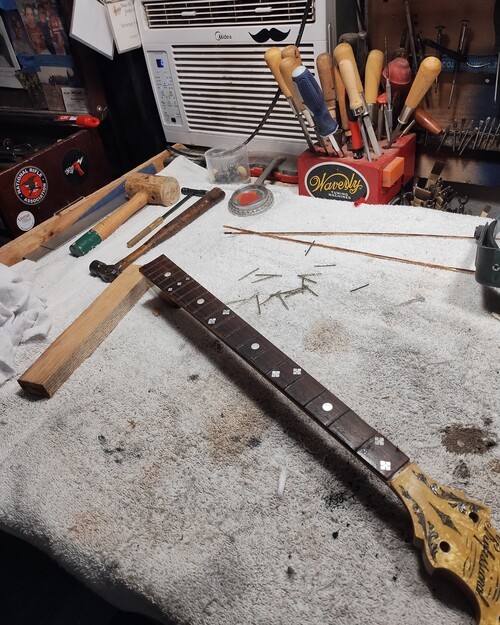
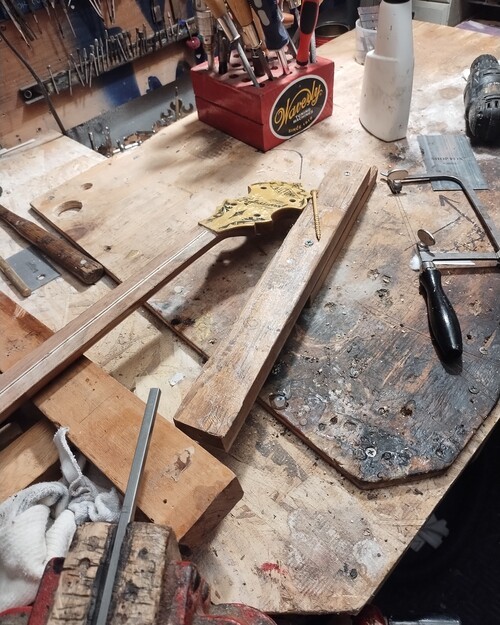
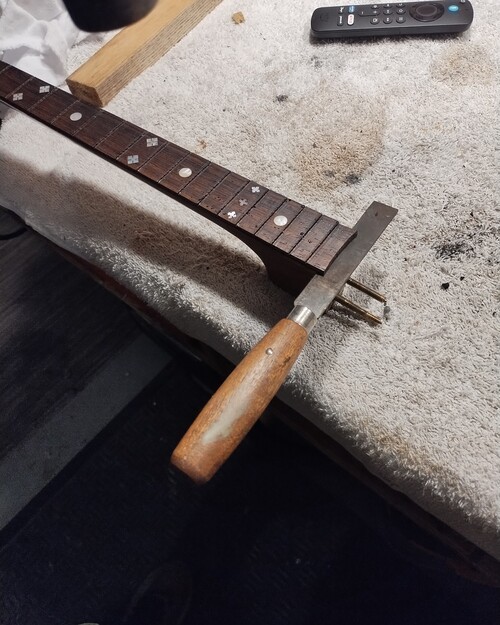
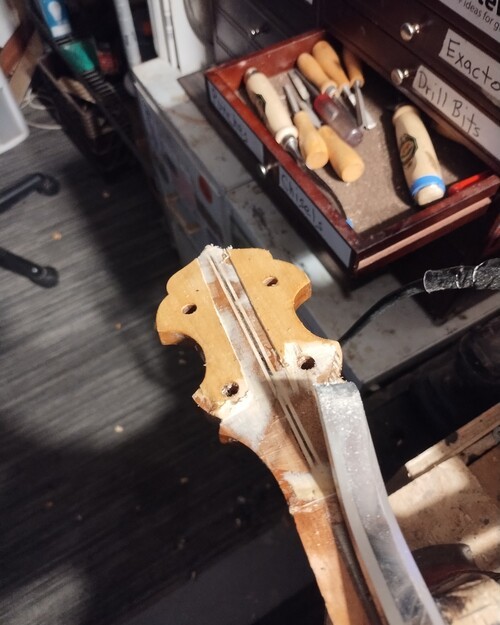
Attempting to remove board,
The first NAIL..arrgh. I frown at Epi for this one.

Beginning to make jig and use the cam to force the neck to the opposite side.
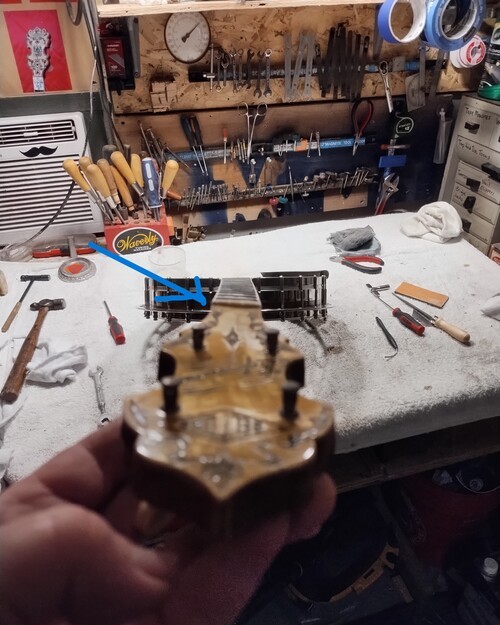
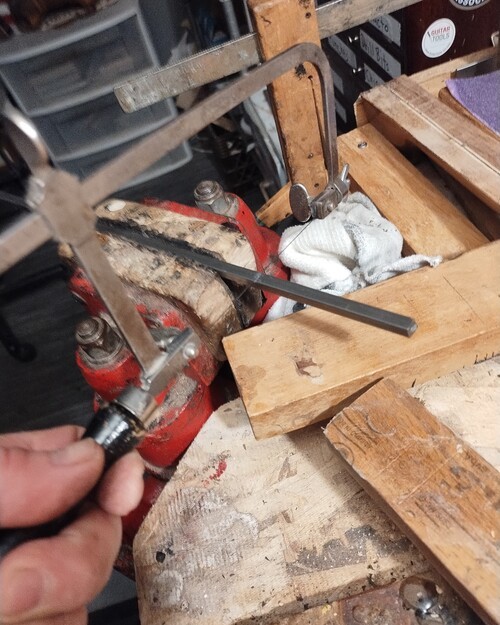
The screw will go in the 1st sting hole to pull peghead twist.
The length I want.
Bar installed ready to seal.
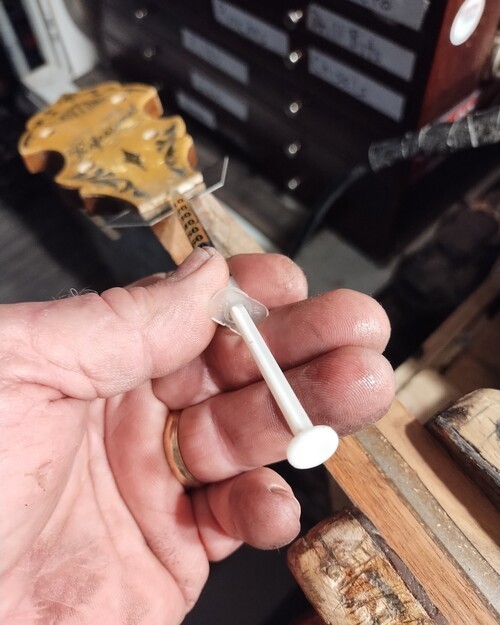
Vinegar to soften hide glue on overlay.
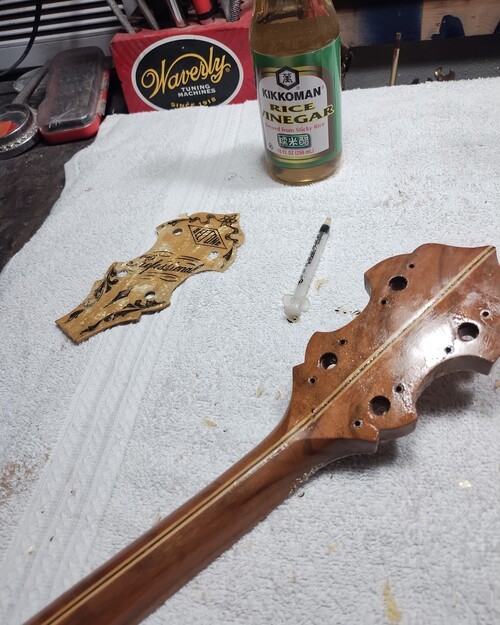
Wild walnut wood weave.
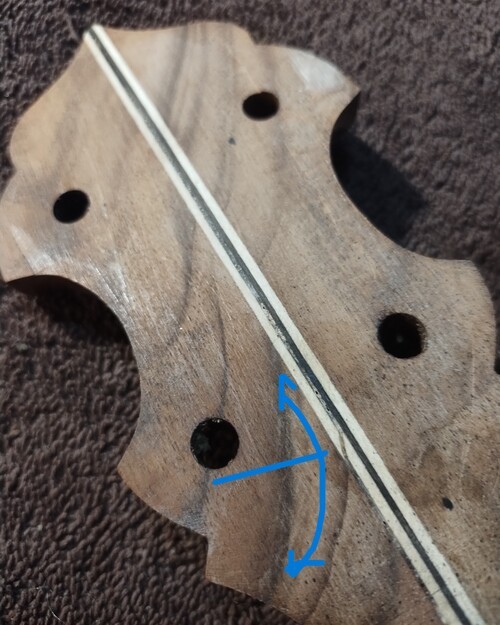
Showing how the warpage broke at the swirled grain and through all 3 laminates.
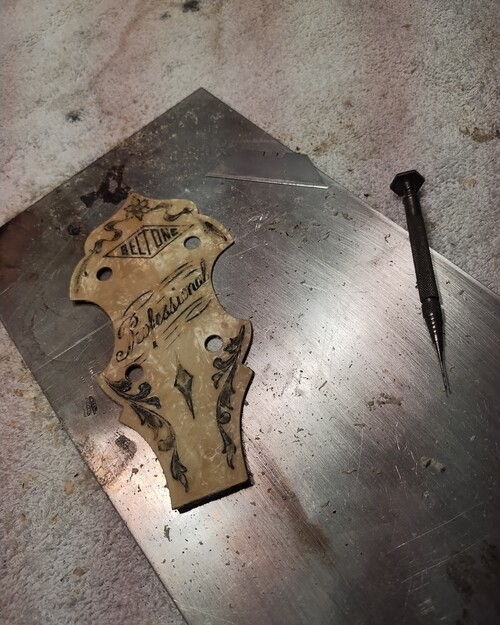
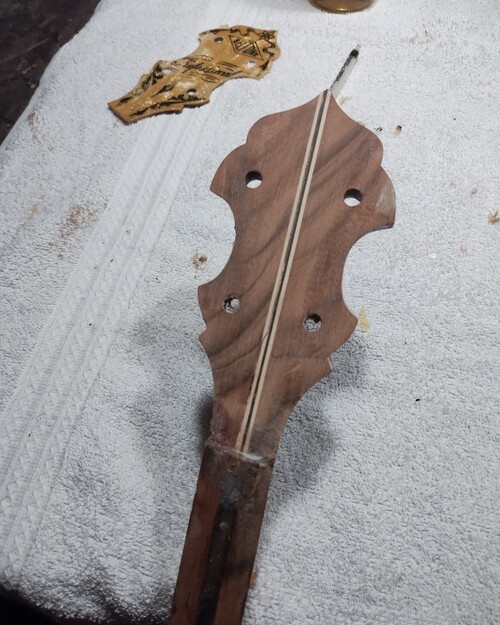
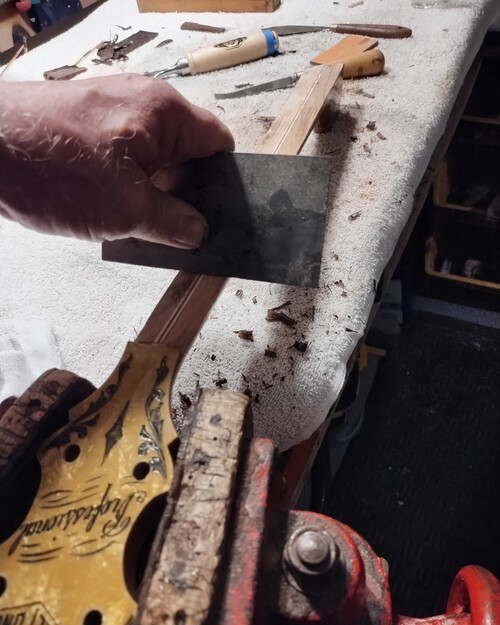
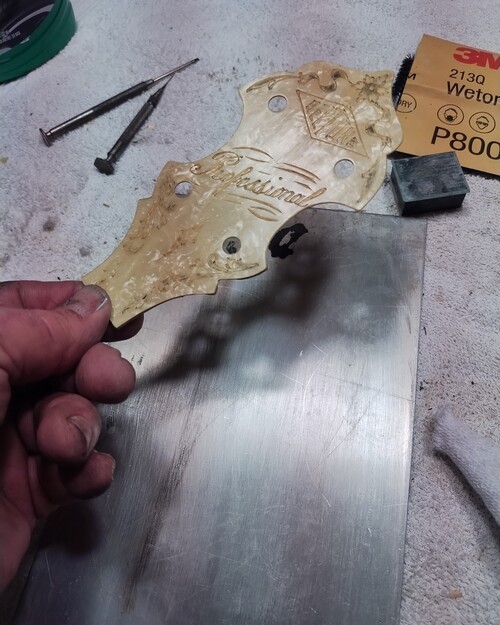
Time to clean engraving lines and old finish.
After removal of excess.
Because these are all negatives,
A worthy opponent, but I will win the battle!

That is why God made chisels.
I want to push PAST straight.

Pulled into a slight back bow, where I want to be.
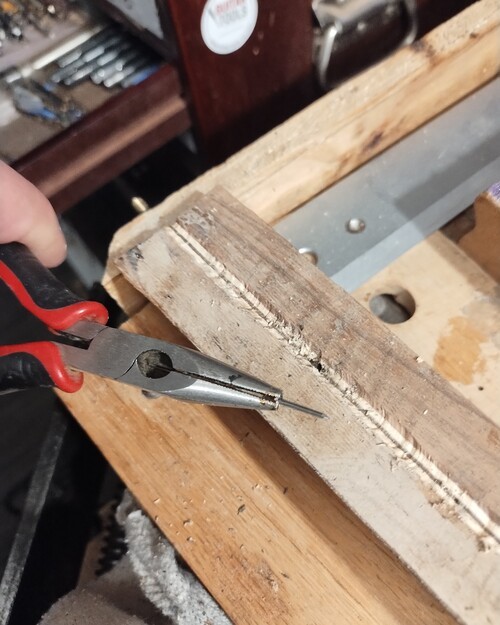
Showing a nail as I make the cavity.
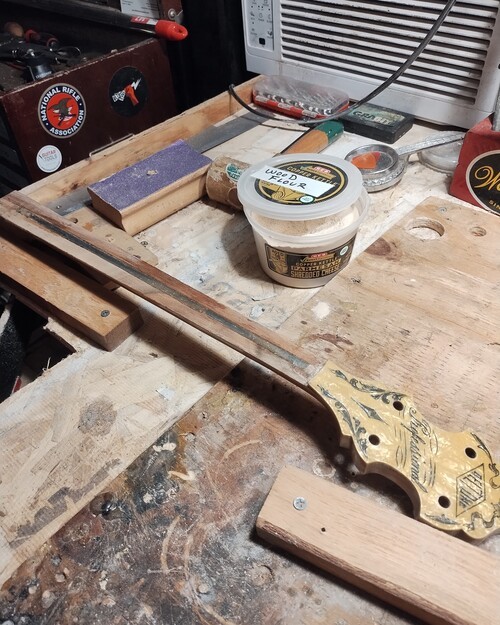
Epoxy and wood flour applied, pressed cured.
Removing maple laminate.
Ready to flat sand,
Removing indexing paint with flat sanding, showing minimal twist now,
Ready to install onto new laminate.
Sequence #3
To save time I did not take pics of the creation of the new rosewood fingerboard.
It came to me already slotted.
I used a 3 piece side binding, Ivoroid/ Black / Ivoroid.
The inlay I choose from my box is slotted squares/ diamonds.
Side markers are 3/32"
To save time I did not take pics of the creation of the new rosewood fingerboard.
It came to me already slotted.
I used a 3 piece side binding, Ivoroid/ Black / Ivoroid.
The inlay I choose from my box is slotted squares/ diamonds.
Side markers are 3/32"
StewMac #147 fret wire
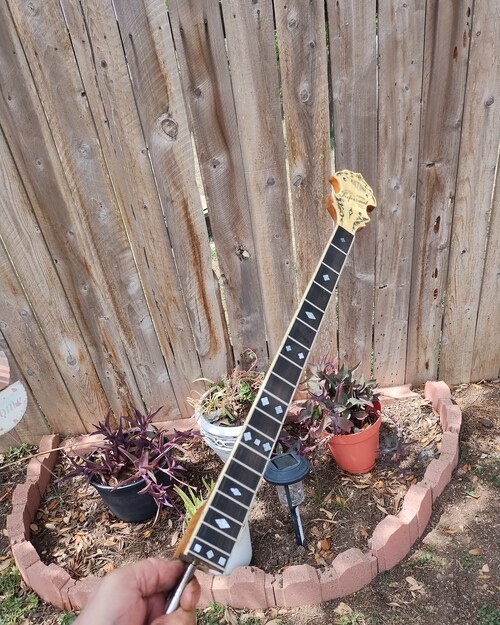
Adding side markers.
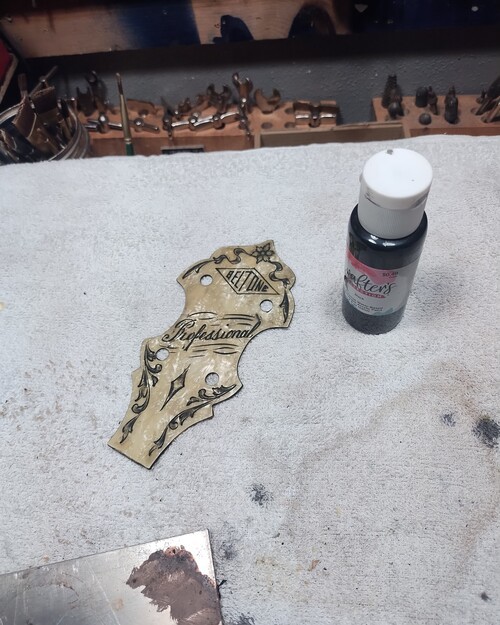
Golden brown tint and clear coats completed.

All sealed, board oiled
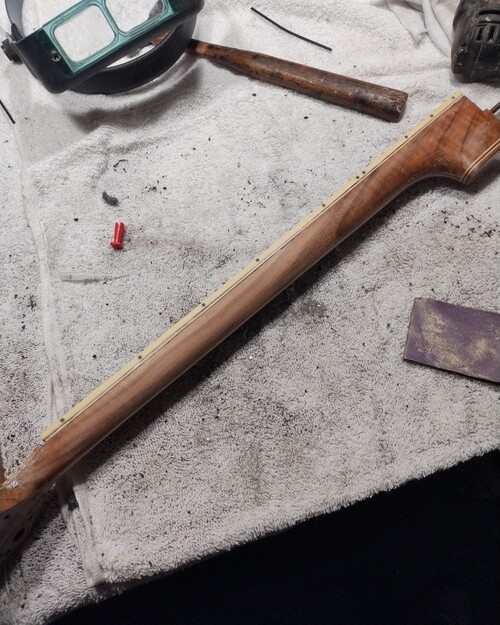
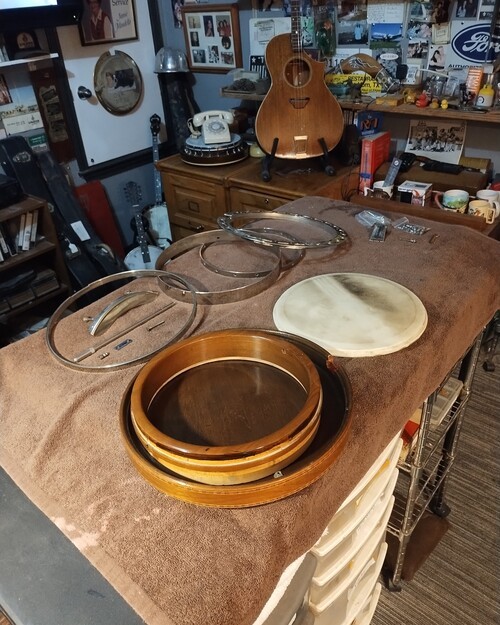
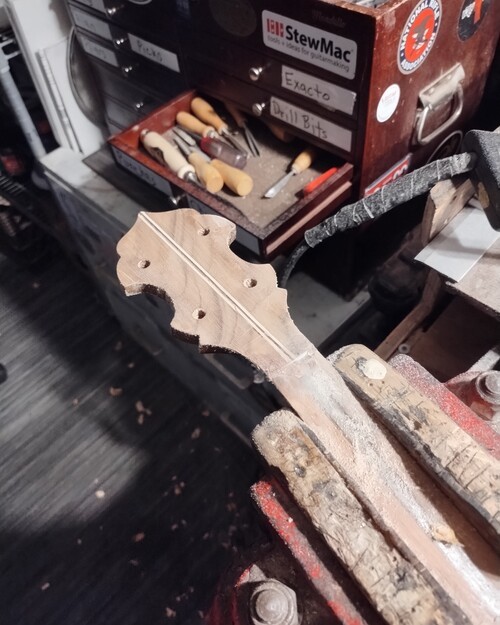
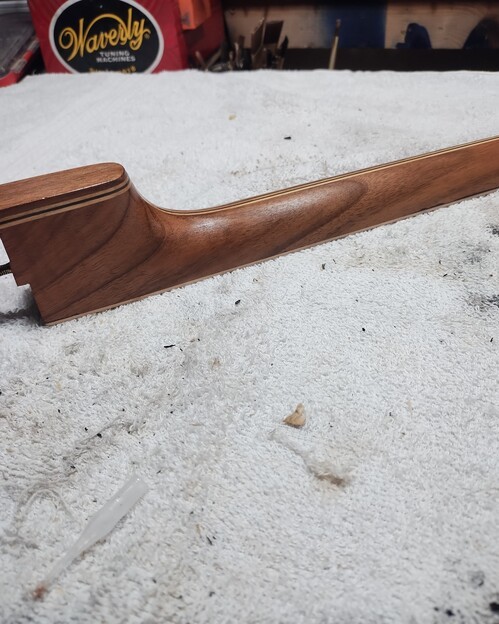
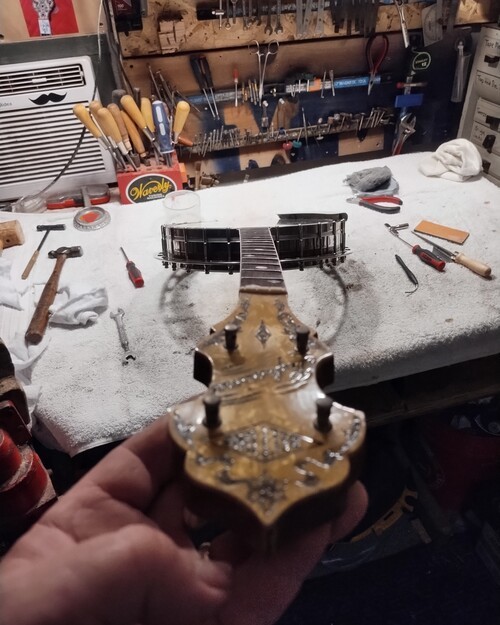
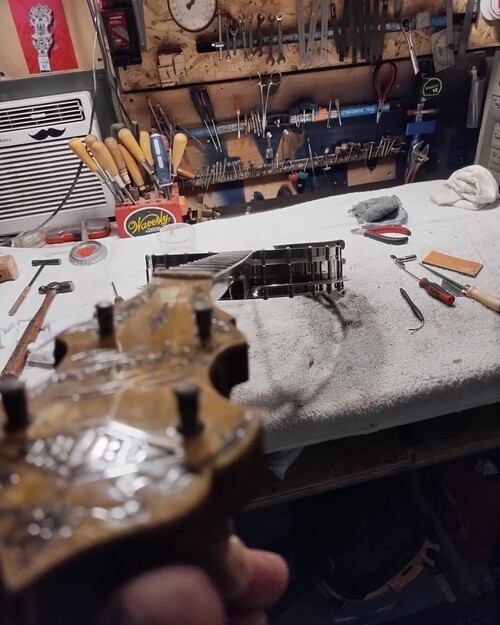
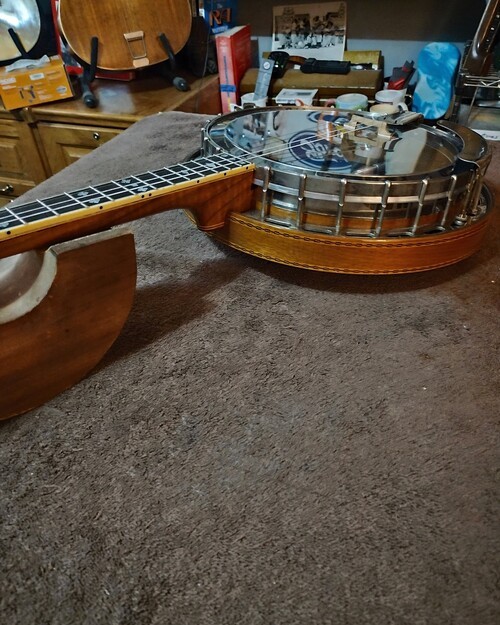
A look next to the rim.
Profiling to meet up with the celluloid.
Sequence #4 - Assembly

Notice. 4 brads are for flange to bear onto.
A good factory idea.
Color match to rim is good.

Reflections in clear head.
Even more reflections this time!
Neck is performing as it should.
It is noting out even before any adjustments, a very good sign.
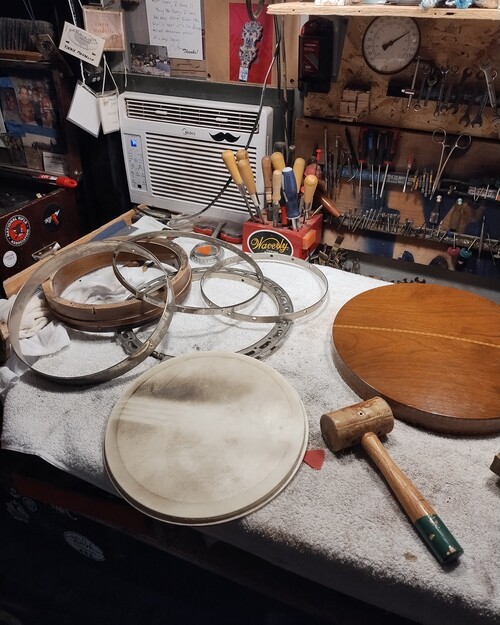
More to follow
It is noting out even before any adjustments, a very good sign.
More to follow