Work Page
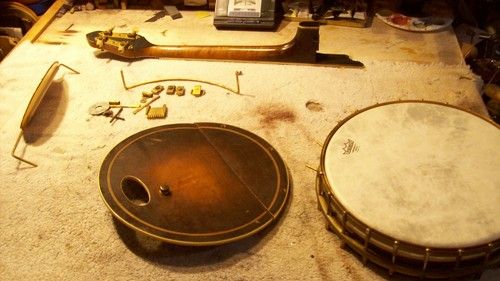
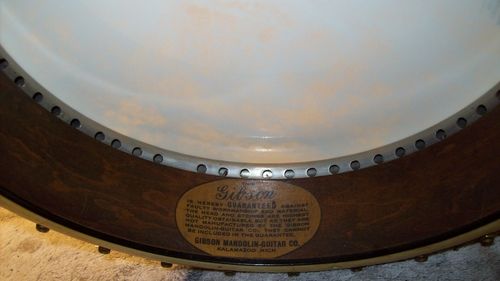
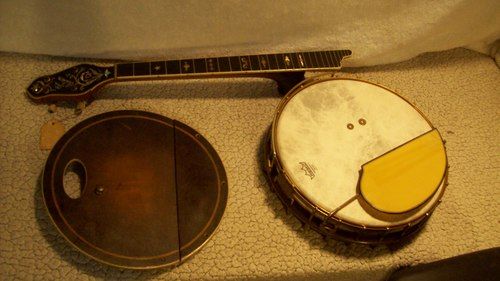
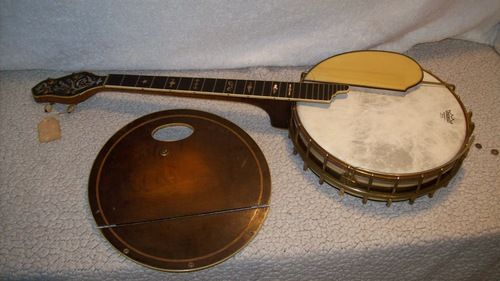
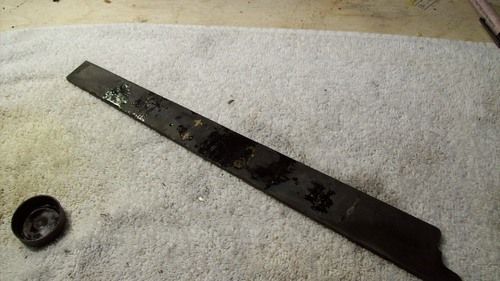
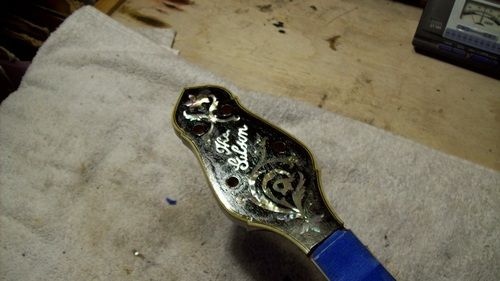
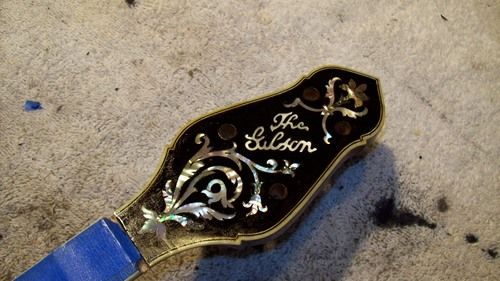
"The Gibson" TB5 Trap Door
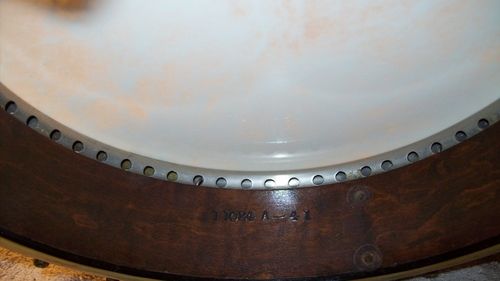
FON 11024 A41
Repair to play
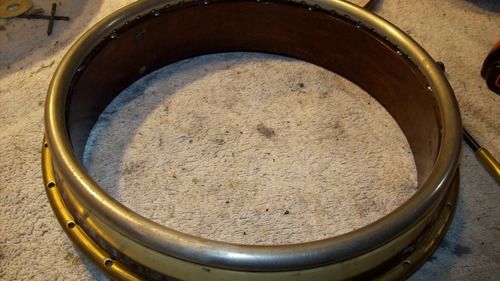
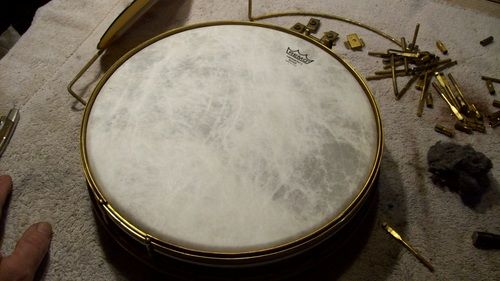
10-1/2" Ball Bearing rim assembly
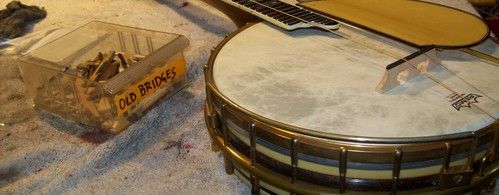
Missing orig co-rods, nuts 1 hook, 3 bracket nuts
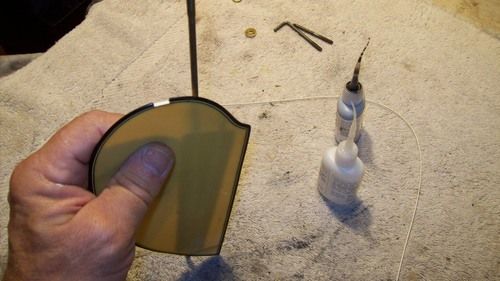
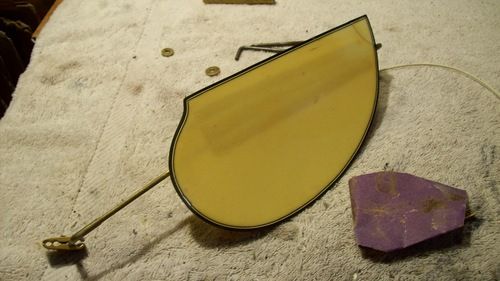
Repair pickguard
Repair to play
10-1/2" Ball Bearing rim assembly
Missing orig co-rods, nuts 1 hook, 3 bracket nuts
Repair pickguard
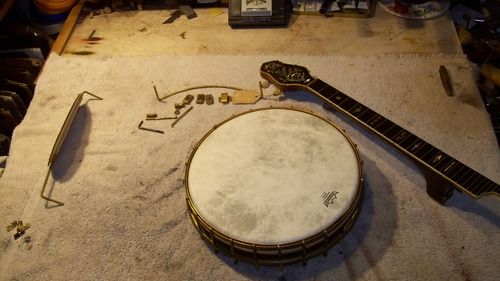
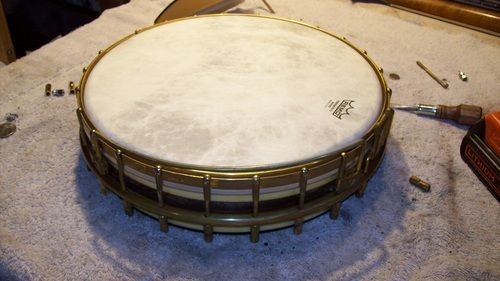
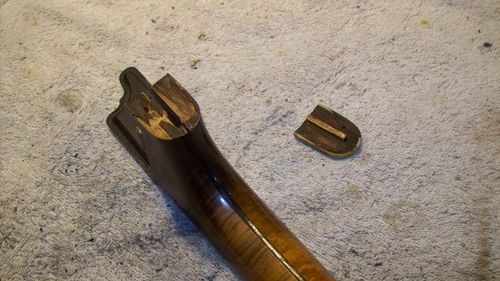
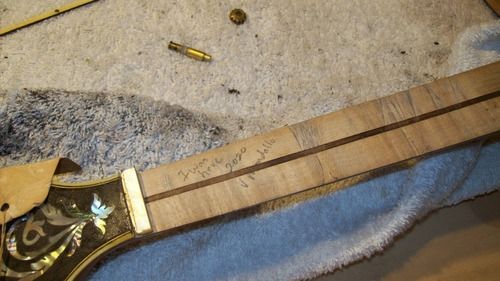
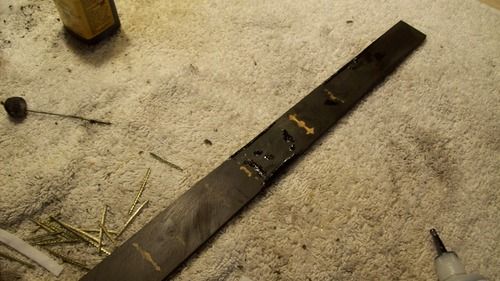
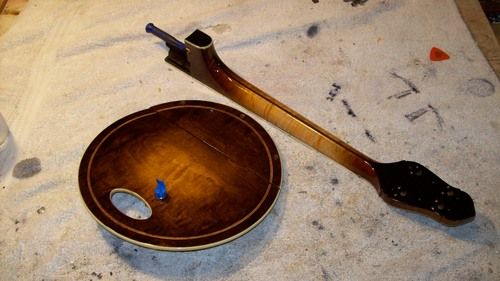
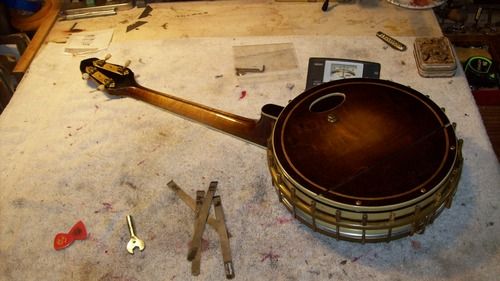
Banjo came in dis-assembled for years, and sadly, some important pieces lost.
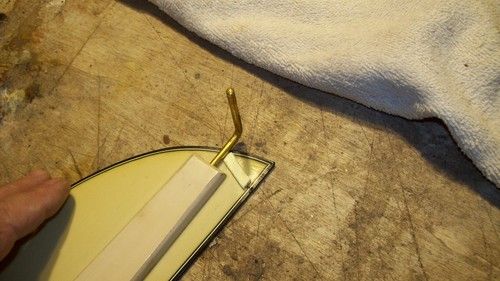
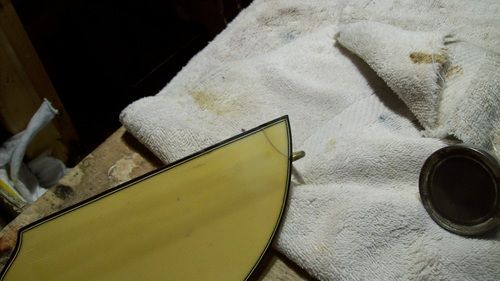
Pick guard had a section broken off, but saved, and another chip at the bottom.
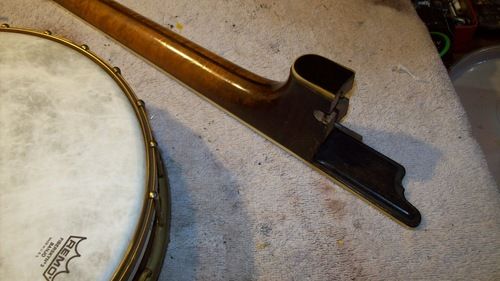
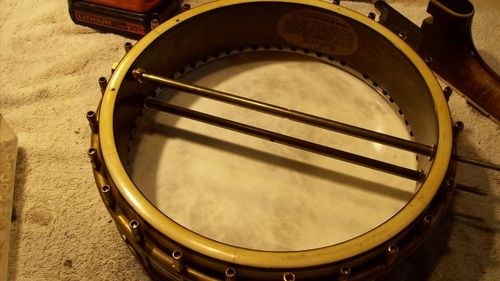
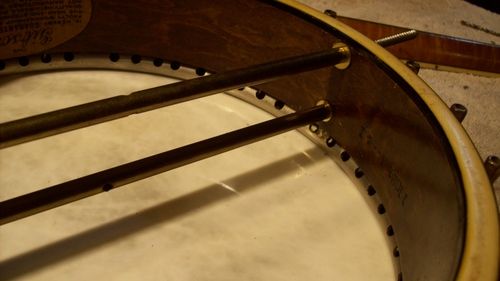
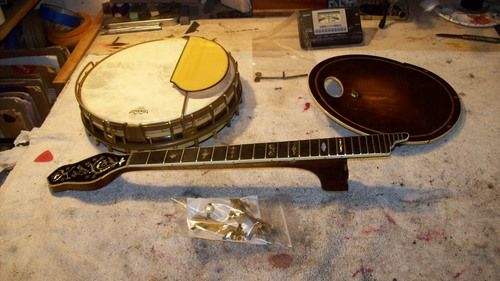
Rim was partially assembled but had to be taken apart and inspected, cleaned, and the tailpiece section installed first.
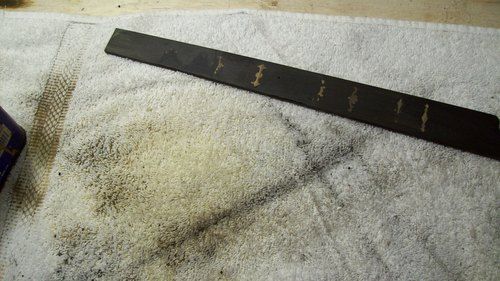
You cannot get the tailpiece on these after installation of head
It was designed for a calfskin, with a thing flesh ring and pics show how tight that is on the tailpiece area when you put a modern head onto it.
So you have to install the tailpiece, fold it down with the tension hoop, install 2 back hooks to hold it and go forth with the rest.
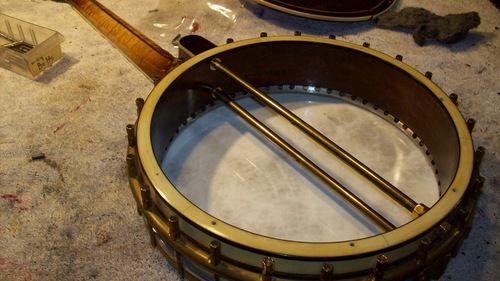
This medium crown head will barely clear the neck notch when at full tension, but it will.
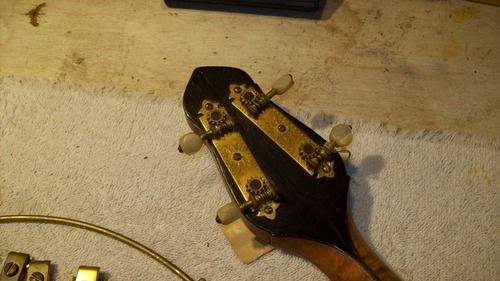
I had modern gold Gibson style tension nuts, that you see me re-threading to proper pitch.
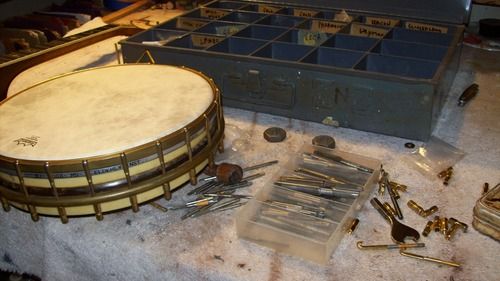
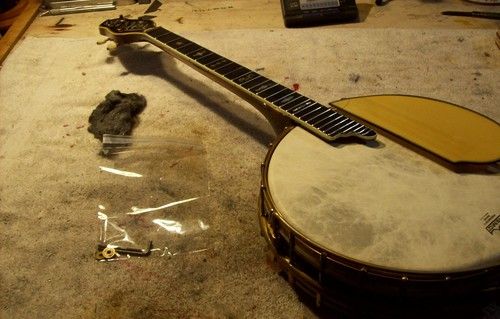
After rim was assembled I mounted armrest, pickguard and will work next on making some co-rods with nuts, to fit it.
Pick guard had a section broken off, but saved, and another chip at the bottom.
Rim was partially assembled but had to be taken apart and inspected, cleaned, and the tailpiece section installed first.
You cannot get the tailpiece on these after installation of head
It was designed for a calfskin, with a thing flesh ring and pics show how tight that is on the tailpiece area when you put a modern head onto it.
So you have to install the tailpiece, fold it down with the tension hoop, install 2 back hooks to hold it and go forth with the rest.
This medium crown head will barely clear the neck notch when at full tension, but it will.
I had modern gold Gibson style tension nuts, that you see me re-threading to proper pitch.
After rim was assembled I mounted armrest, pickguard and will work next on making some co-rods with nuts, to fit it.
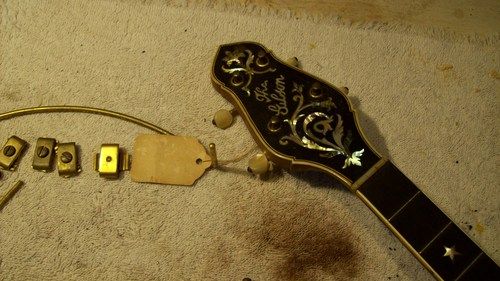
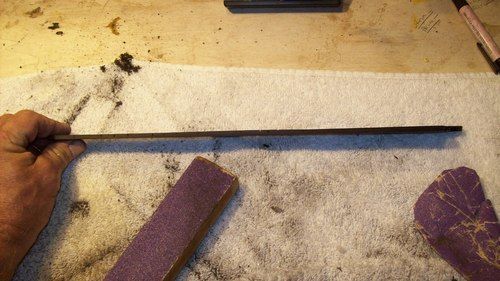
Stage 2
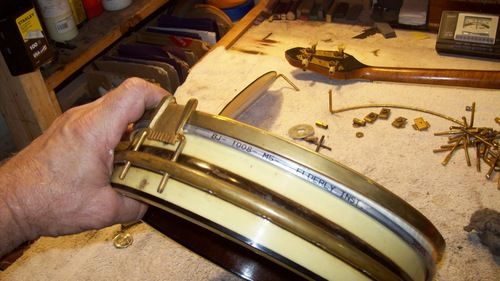
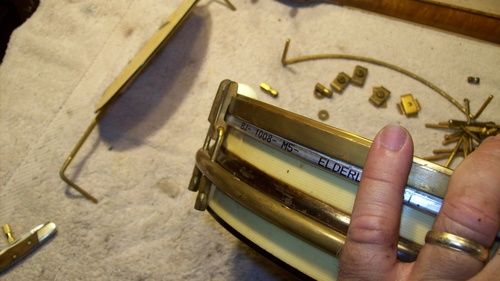
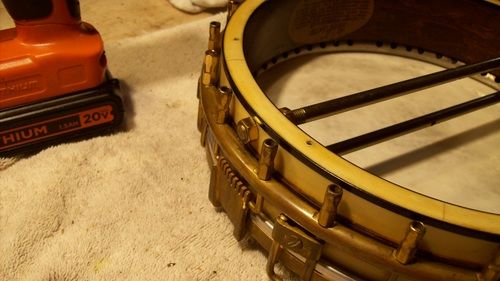
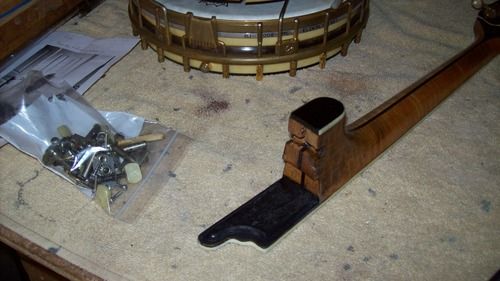
I made the co-r0ds from brass, threaded , nutted up with gold nuts and proper lags
Rim was drilled accordingly, to fit new style hardware.
Brass looks right with this patina.
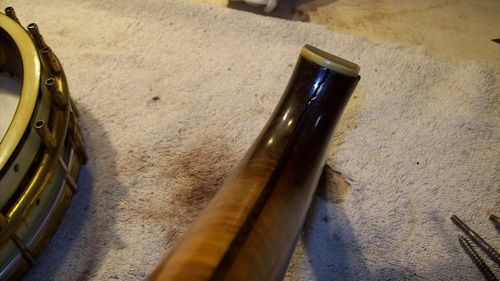
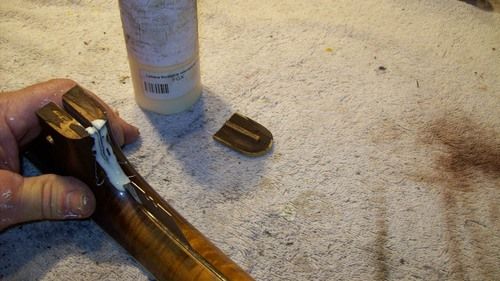
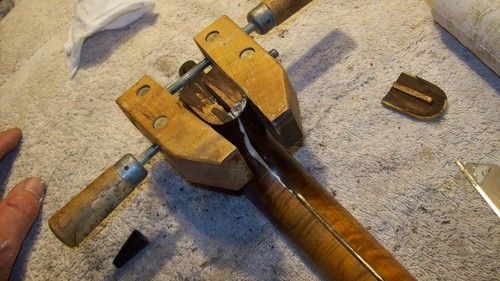
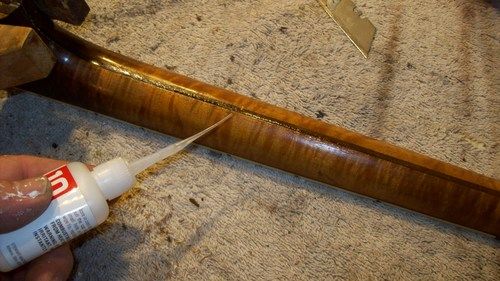
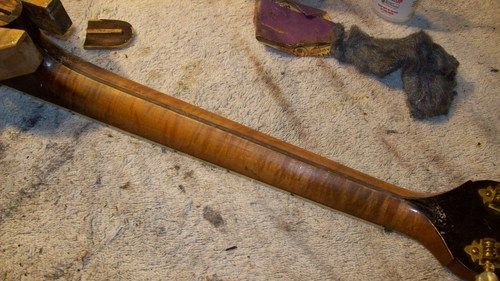
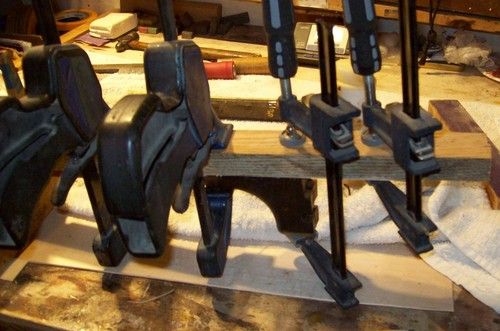
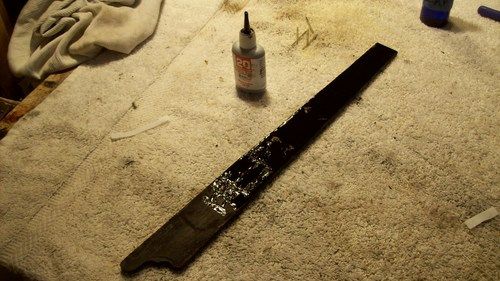
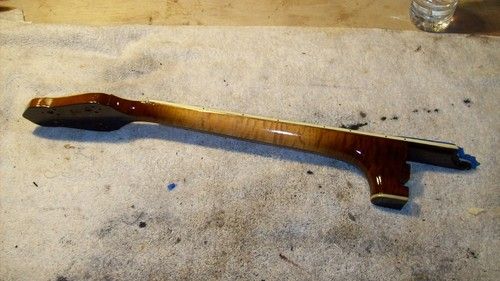
Heel repair has begun, I fed in LMI yellow glue and clamped
Then #10 CA to wick in to the center laminate up the neck.
It did its job, nearly an oz was wicked into the seam, that will stiffen the neck back up.
Rim was drilled accordingly, to fit new style hardware.
Brass looks right with this patina.
Heel repair has begun, I fed in LMI yellow glue and clamped
Then #10 CA to wick in to the center laminate up the neck.
It did its job, nearly an oz was wicked into the seam, that will stiffen the neck back up.
Stage 3
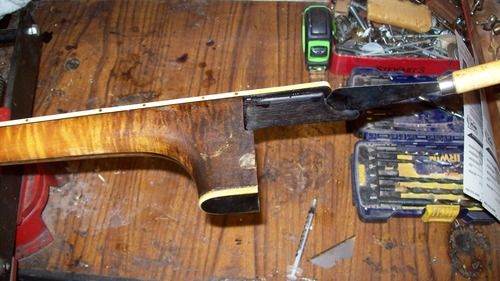
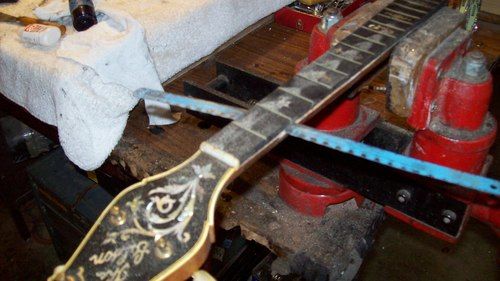
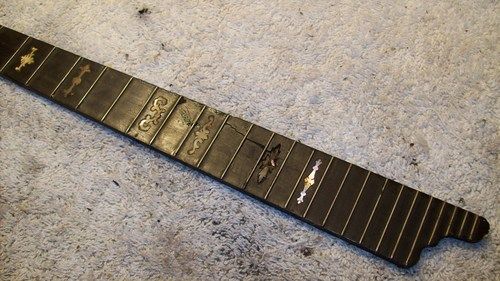
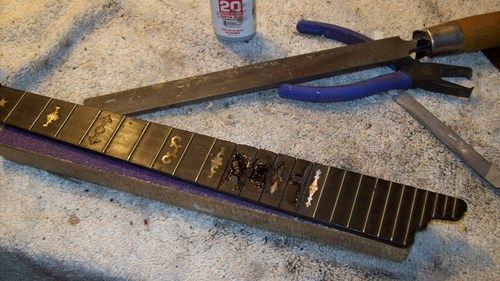
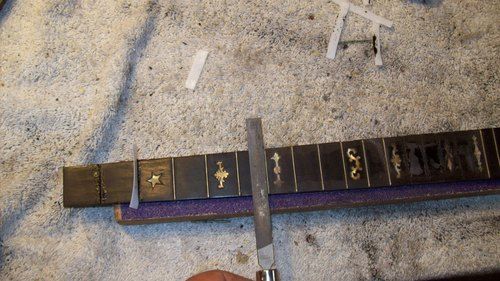
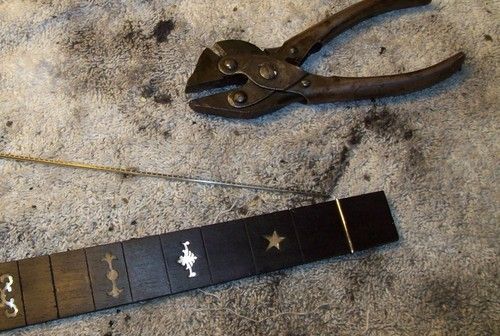
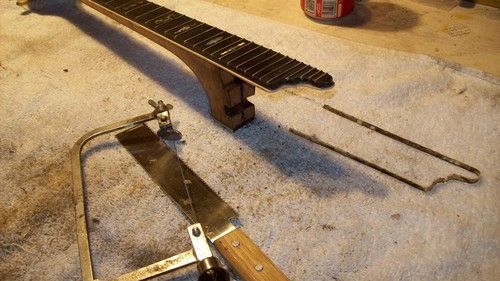
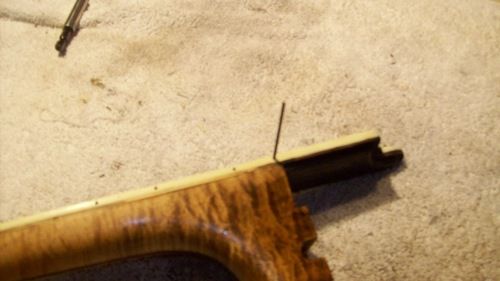
Next is fingerboard removal.
I was able to free the extension with vinegar injections to soften the hid glue
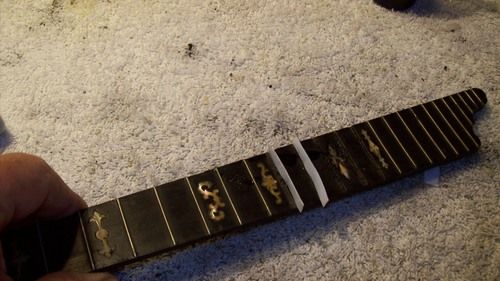
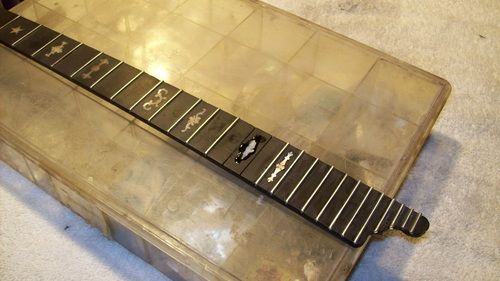
The board is severely "cupped" from shrinkage over time. This means there is a dip all the way down its center, and ts high on the edges.
After several hours of heat, there was no movement in the glue except at the edges
I tried to get vinegar down into it, even my steam needle would not free it.
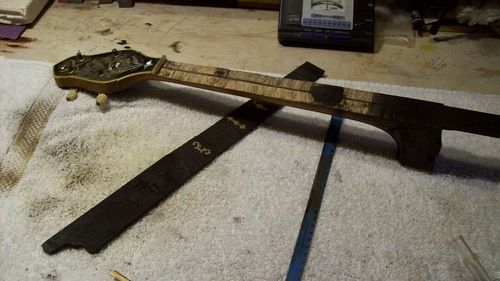
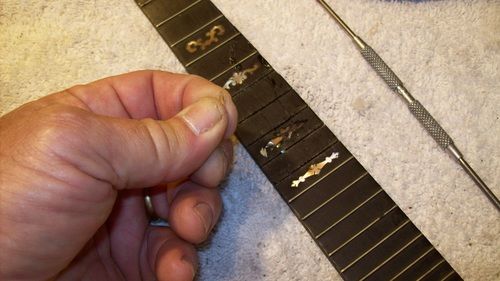
The board let loose with a pop in that area but did not come free cleanly, with an already broken inlay crumbling the rest of the way.
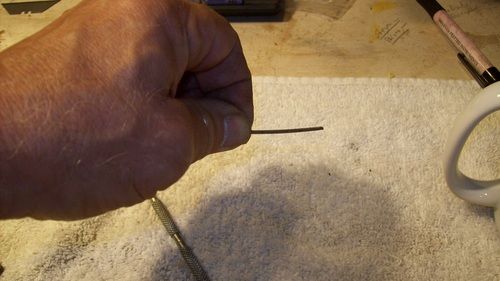
So I ended up using 6 hacksaw blades and in 2 hours, carefully saw it from the neck. You can see the one stuck spot. Got it all cleaned up, low spots filed with #20 and flattened, the sequence is long and tedious.
This is when you all need to understand, that there is a Restoration, and then there is what is called CONSERVATION.
Sure, I could have made a new fingerboard and inlay at great cost, but instead I chose the route of saving what it came with.
Its not always pretty doing this work, and it is how you rebound from difficulty that gets you through a day of Lutherie.
This is over 100 years ole, it does not go like "clockwork" in a normal day.
Well hell, maybe it is like clockwork!
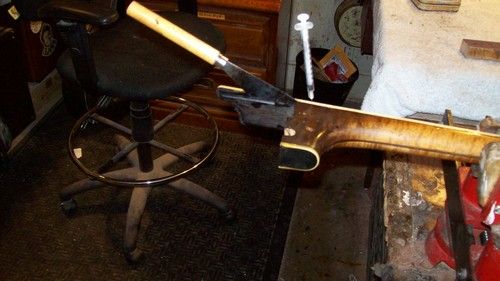
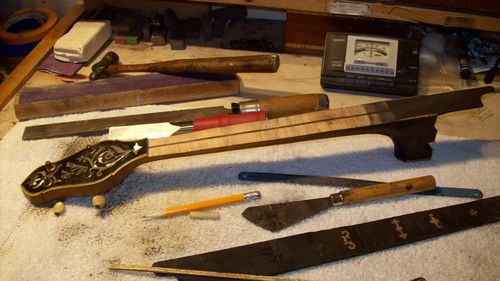
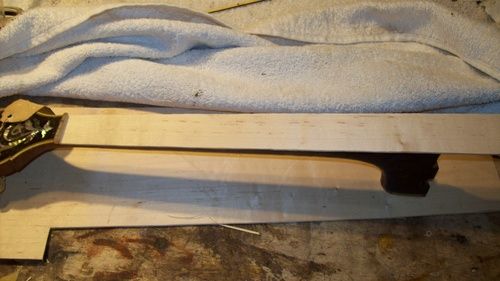
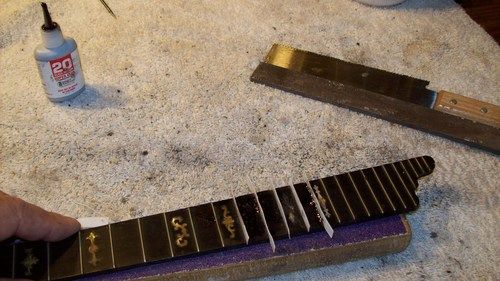
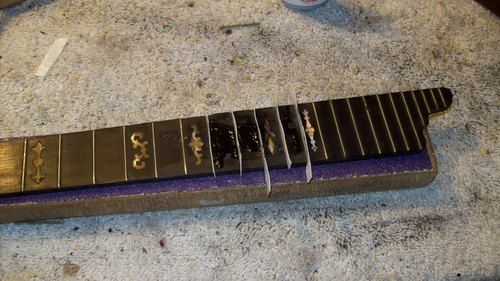
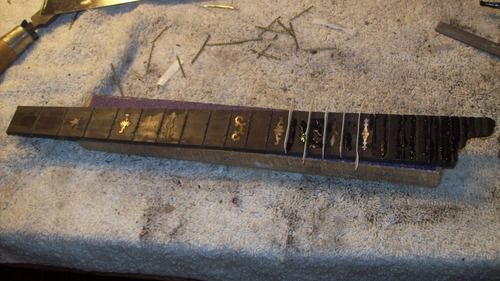
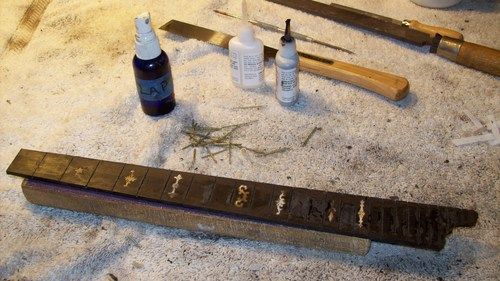
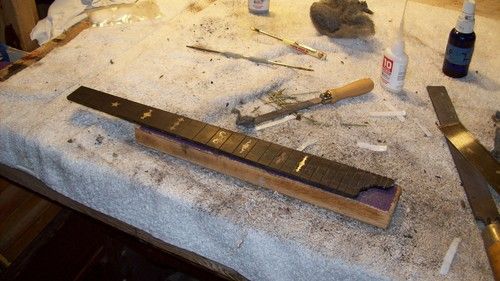
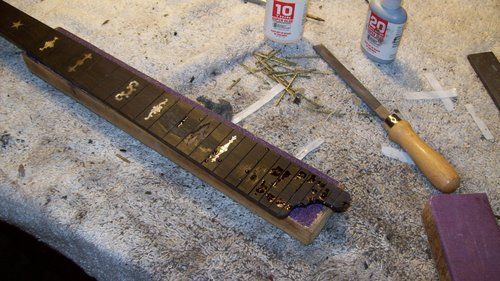
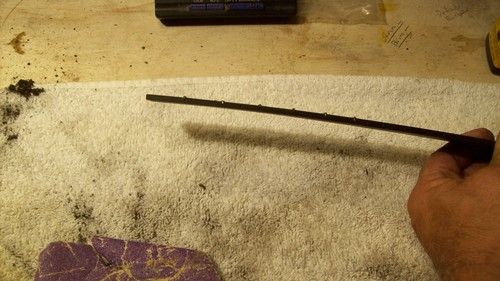
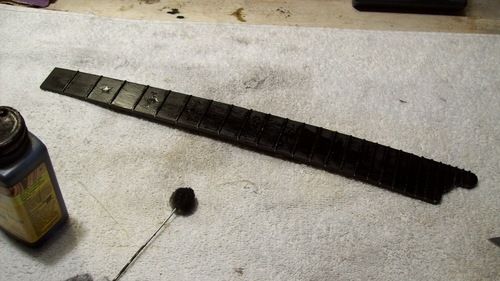
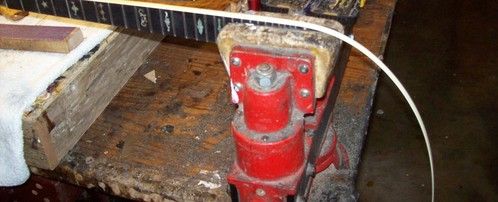
Then, add a new base board of maple after heat press to flatten, and start the fingerboard repair.Prepping frets slots using Teflon dams to keep my slots cleanable.
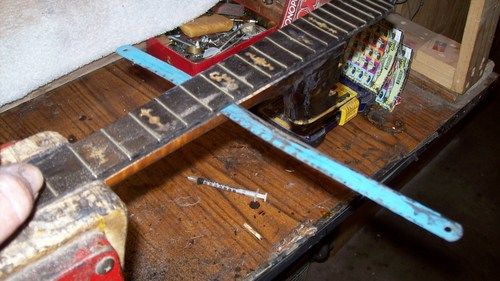
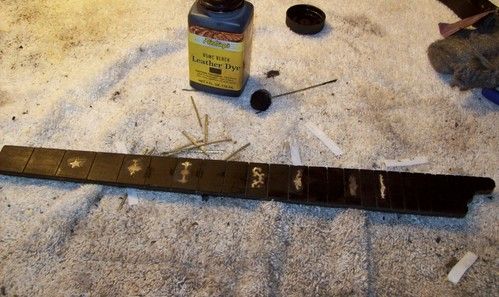
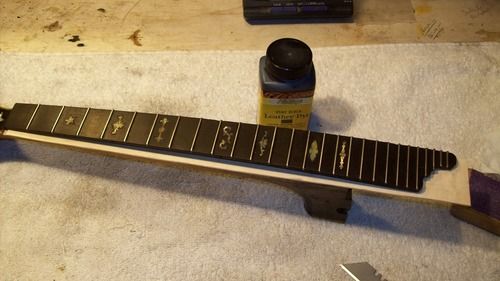
Its fill/level/fill low spots/level, over and over until you get where you need to be. You can see the cupping in the pics, and I showed one of the cupped fret wires in my fingers, its that severe.Then I dye the board, re-slot to proper depth for new wire. Will add an inlay later on. Stew Mac 147 wire is chosen. I will fret it off the neck, to gain maximum board compression. You can see how frets drive by wedging kerfed wood, into a curvature.
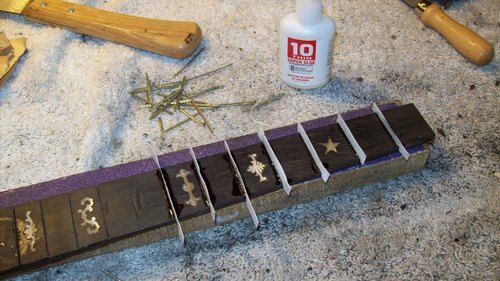
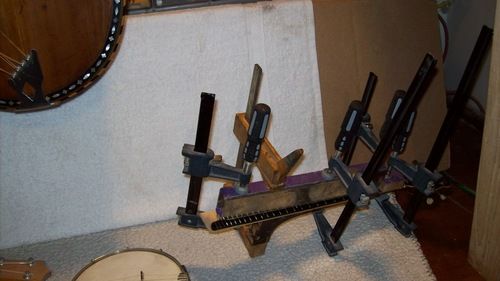
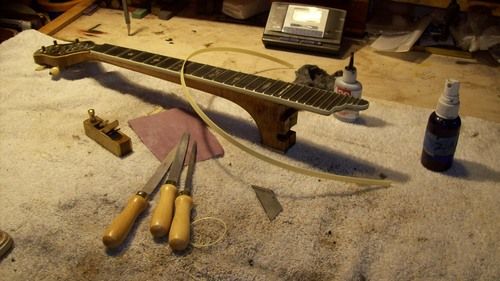
Then when its ready to glue on, I can compress it from the center, with glue and clamps to get max push and less chance of excessive neck forward pull . Bernard pliers will do the compressing, they have a flat plane jaw set.
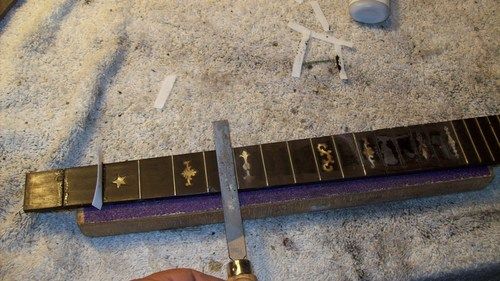
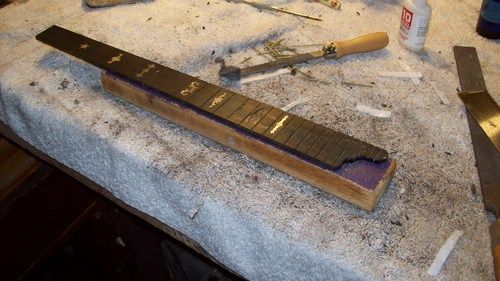
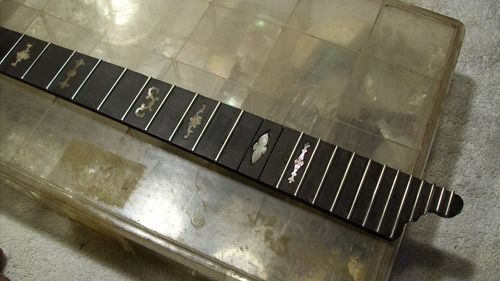
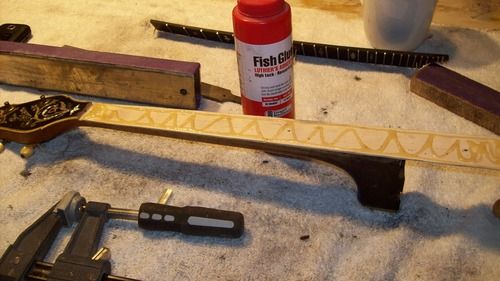
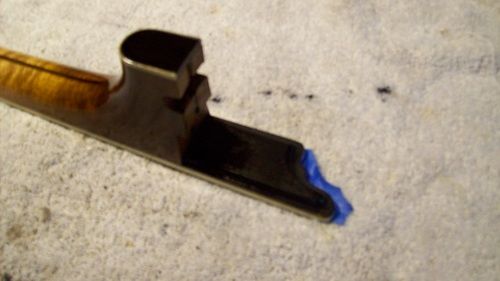
Then its time to get it glued into place and prep for binding
Not an easy bind with the fancy extension, but I have done a few so know the tricks.
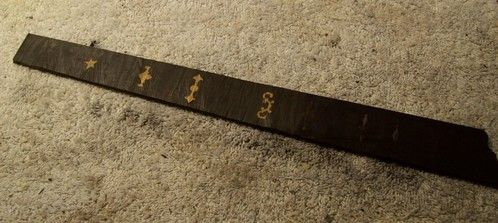
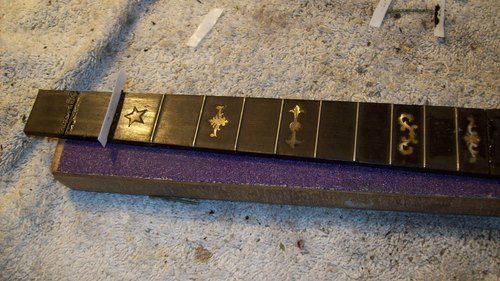
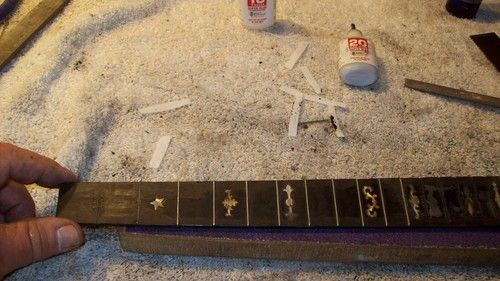
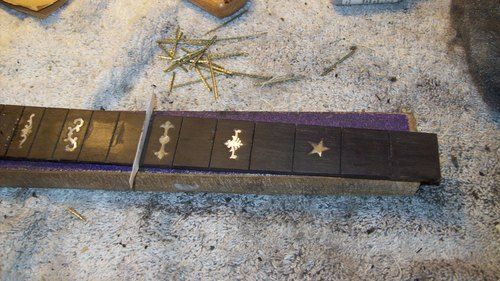
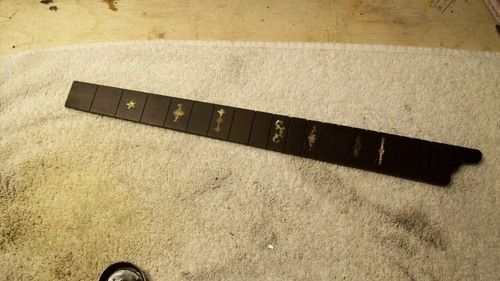
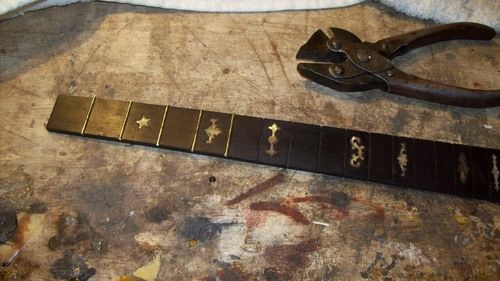
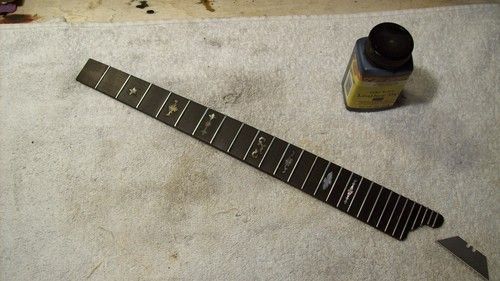
First I will drop in an inlay, that is close to the size of the orig cavity, and is from a Gibson
To setup and cut one inlay like was in it is just another budget increase. This one has the same tint and if the customer wants the exact replacement, I can do for a fee. This was the "easy way out" I mean, its got a star at 3, its not like its a consistent pattern!
I was able to free the extension with vinegar injections to soften the hid glue
The board is severely "cupped" from shrinkage over time. This means there is a dip all the way down its center, and ts high on the edges.
After several hours of heat, there was no movement in the glue except at the edges
I tried to get vinegar down into it, even my steam needle would not free it.
The board let loose with a pop in that area but did not come free cleanly, with an already broken inlay crumbling the rest of the way.
So I ended up using 6 hacksaw blades and in 2 hours, carefully saw it from the neck. You can see the one stuck spot. Got it all cleaned up, low spots filed with #20 and flattened, the sequence is long and tedious.
This is when you all need to understand, that there is a Restoration, and then there is what is called CONSERVATION.
Sure, I could have made a new fingerboard and inlay at great cost, but instead I chose the route of saving what it came with.
Its not always pretty doing this work, and it is how you rebound from difficulty that gets you through a day of Lutherie.
This is over 100 years ole, it does not go like "clockwork" in a normal day.
Well hell, maybe it is like clockwork!
Then, add a new base board of maple after heat press to flatten, and start the fingerboard repair.Prepping frets slots using Teflon dams to keep my slots cleanable.
Its fill/level/fill low spots/level, over and over until you get where you need to be. You can see the cupping in the pics, and I showed one of the cupped fret wires in my fingers, its that severe.Then I dye the board, re-slot to proper depth for new wire. Will add an inlay later on. Stew Mac 147 wire is chosen. I will fret it off the neck, to gain maximum board compression. You can see how frets drive by wedging kerfed wood, into a curvature.
Then when its ready to glue on, I can compress it from the center, with glue and clamps to get max push and less chance of excessive neck forward pull . Bernard pliers will do the compressing, they have a flat plane jaw set.
Then its time to get it glued into place and prep for binding
Not an easy bind with the fancy extension, but I have done a few so know the tricks.
First I will drop in an inlay, that is close to the size of the orig cavity, and is from a Gibson
To setup and cut one inlay like was in it is just another budget increase. This one has the same tint and if the customer wants the exact replacement, I can do for a fee. This was the "easy way out" I mean, its got a star at 3, its not like its a consistent pattern!
Stage 4
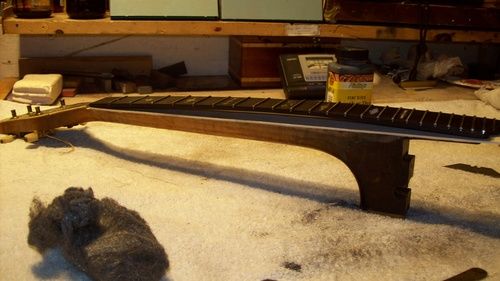
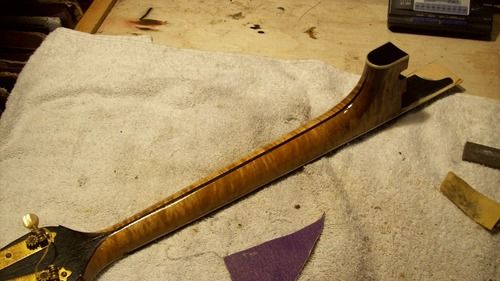
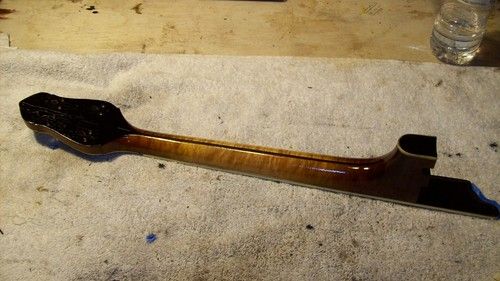
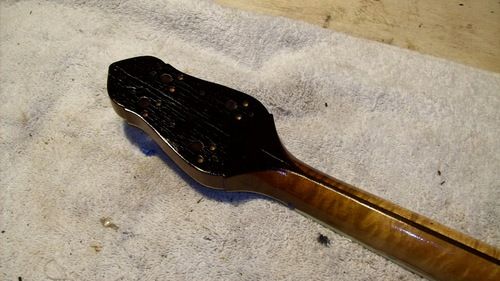
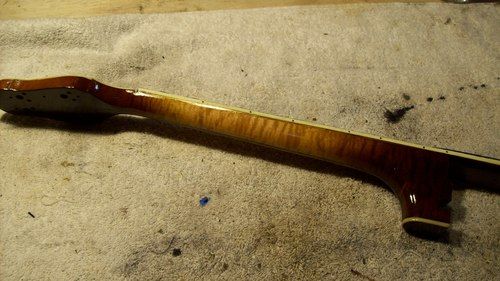
Now I have got it all bound, side markers, sanded and prepped for finish
Same Vintage Maple tints at heal and peg head, back of peg head dyed, front repaired and dyed. after a few more coats, we will be into fret leveling
Rim was left original, as many Gibson lovers prefer.
Now I will dress up the resonator with some fresh clear coats, original tint left intact.
*****************************
6-18 UPDATE
Assembly phase, after fret leveling/crowning/polishing.
Added lags to the heel for the new rods.
Oiled the tuning machines, cleaned the MOP buttons.
Since it is short scale I set it up 34-26-15-11 to get some bite.
Neck angle is nice, and with the tall elevation, it takes a whopper bridge, almost 1"
Found some correct style screws for the trap door
It has a good action at that height so will leave it be while it settles in, and do final tweaking.
I will ask and see if the customer wants me to look in my caches, for a vintage case.
FINAL PICS ,COMING SOON
Thanks for watching, sharing, inquiring
VM
Thanks for watching, sharing, inquiring
VM